Celebrating student work is important and I have found that using Google Slides to do it has helped offer a way for students and parents to interact with the work online. Please click through the slideshows and enjoy the work of my students from the last two years of competition cycles!
|
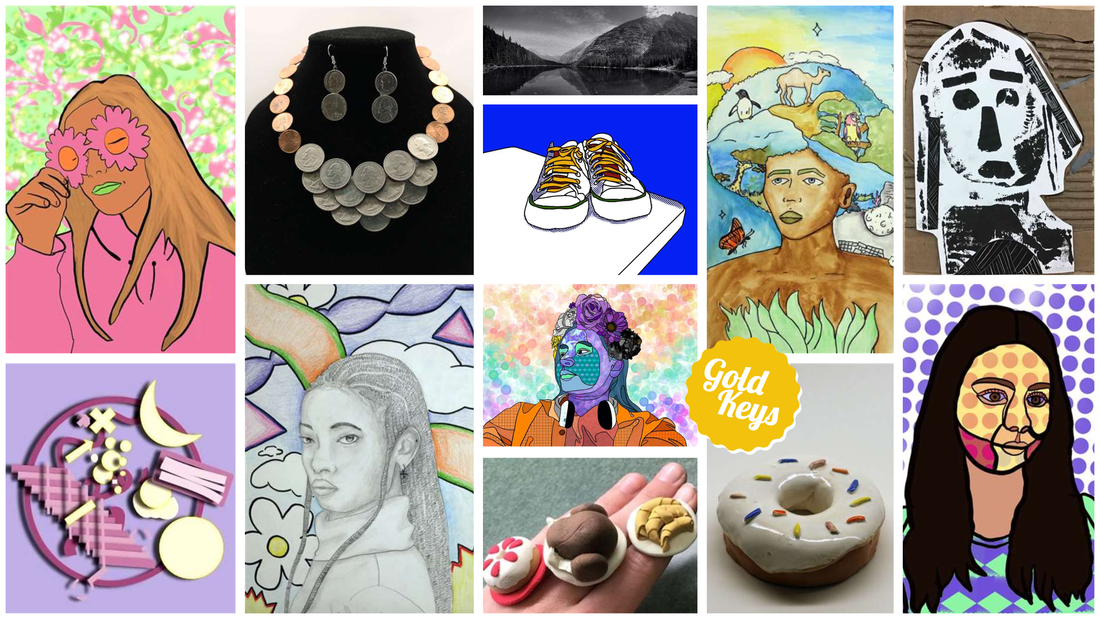
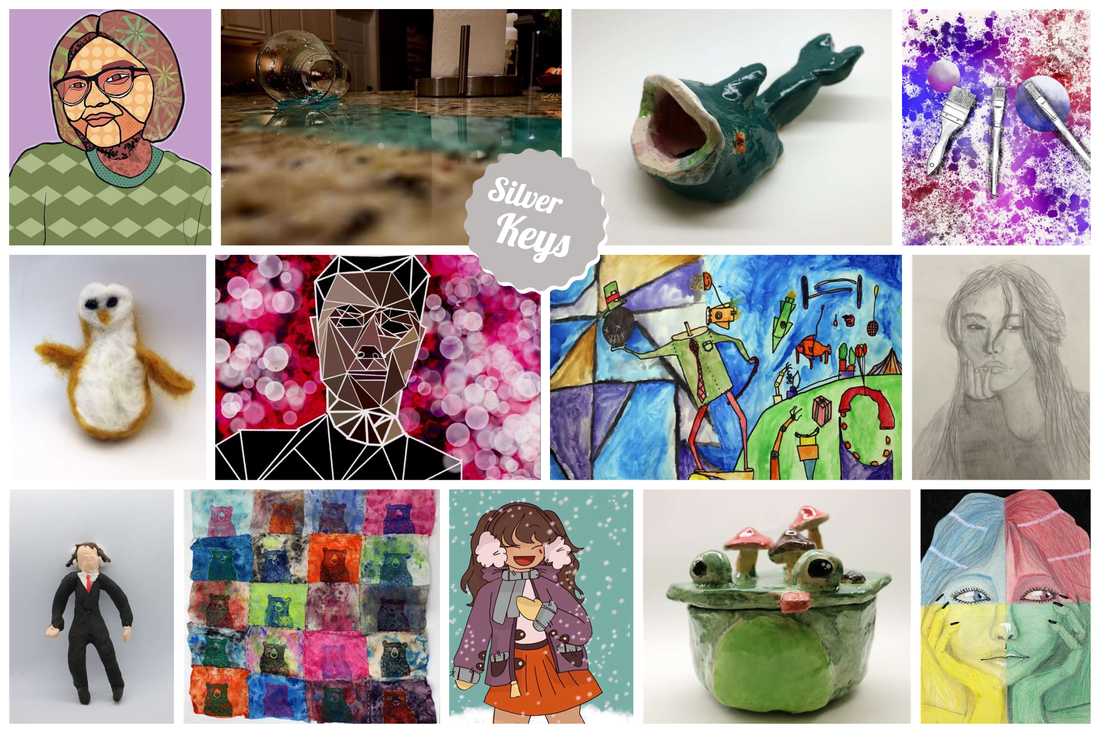
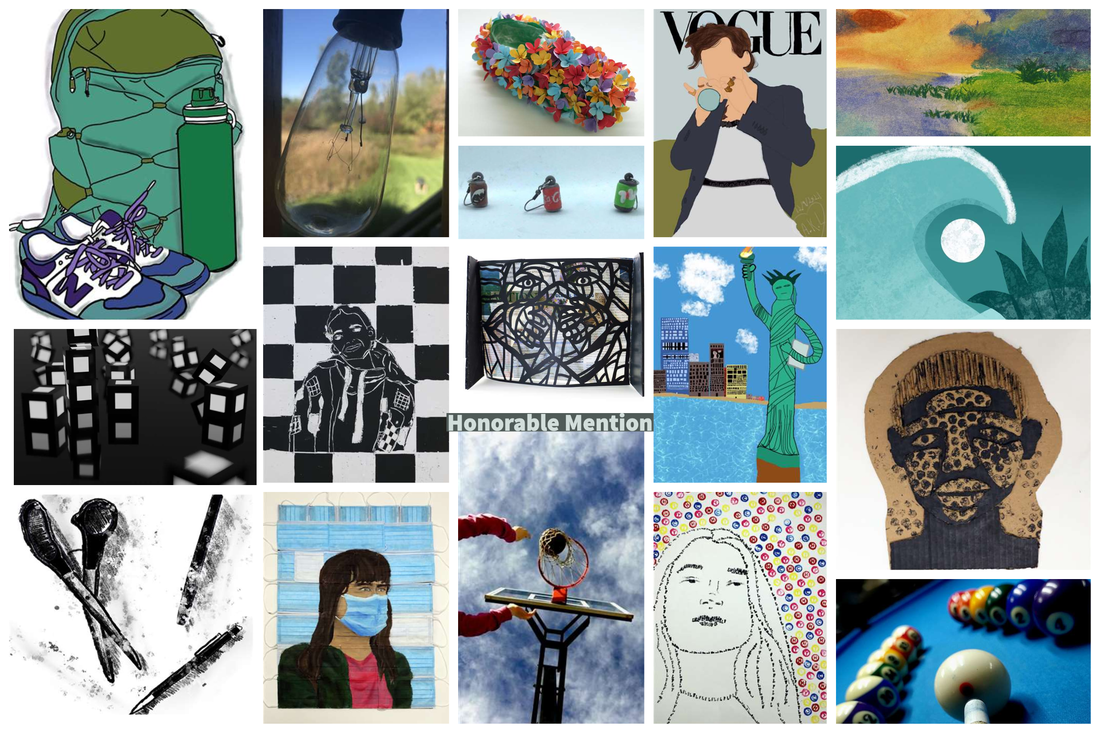
As I posted our 22 Scholastic Award winners, I realized that I had not previously shared the past 2 years of results!
Celebrating student work is important and I have found that using Google Slides to do it has helped offer a way for students and parents to interact with the work online. Please click through the slideshows and enjoy the work of my students from the last two years of competition cycles!
2 Comments
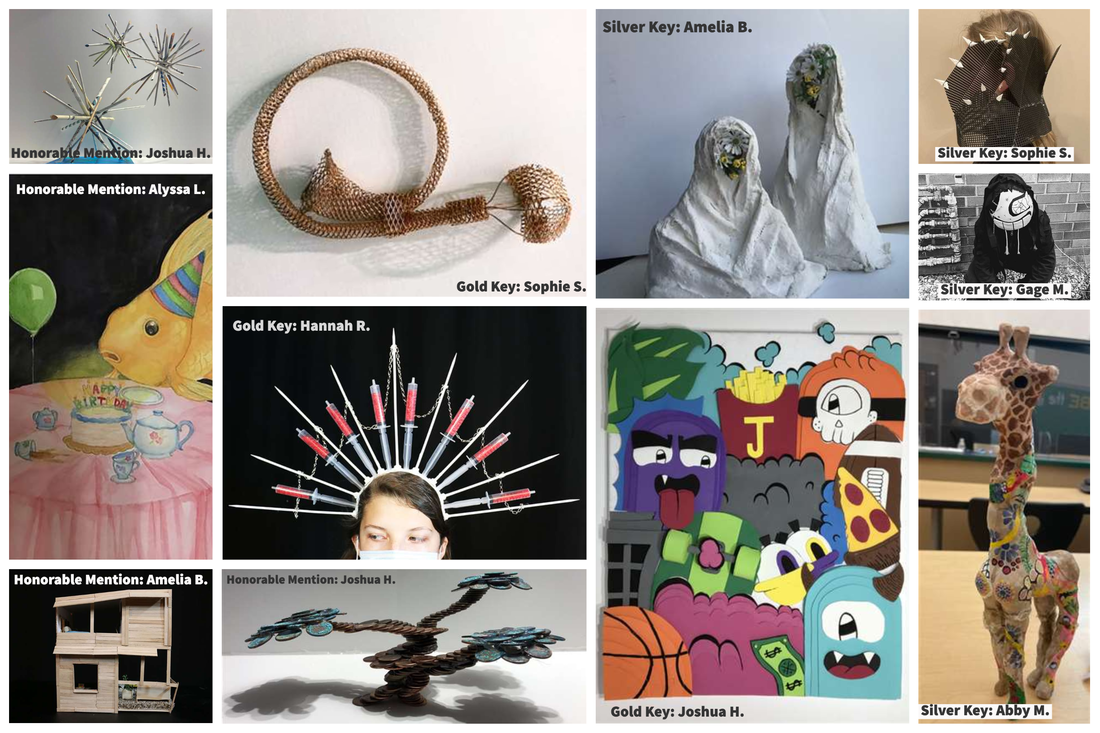
We are pleased to announce the 2022 West Central Michigan Regional winners for WMS:
Ava A: 2 Honorable Mentions Lucas B: Gold Key Mason B: 2 Honorable Mentions Emmerson B: Gold Key Adam C: Honorable Mention Riley D: 2 Gold Keys Layla F: Gold Key and Honorable Mention Jadelyn H: Silver Key Jay I: 2 Gold Keys, Silver Key, 2 Honorable Mentions Madeline K: Gold Key, 2 Honorable Mentions Ella L: Gold Key Aubree L: Silver Key, Honorable Mention Andrew M: Honorable Mention Vaughn N: Silver Key Grant P: Honorable Mention Josie R: Honorable Mention Ryana R: Silver Key Izzy S: Gold Key, 2 Silver Keys, 3 Honorable Mentions Addison S: Silver Key, 2 Honorable Mentions Kayla S: Silver Key Lucy T: Silver Key, Honorable Mention Bella W: Silver Key Josh W: Silver Key Samantha Y: Gold Key
It was also a pleasure that some of the students I teach for the Dual Enrollment program as well as previous WMS students who have moved onto the HS that I taught last year, also received recognition:
Combined, BCPS 7-12 students earned a total of 99 awards! You can learn more about this competition here. Gold Key winning works will move onto the National competition and results will be posted later this Spring.
The last time I shared on here, I gave away some of the "secrets" to how I structure lessons in my class using Design Thinking. This was all shared before getting started with teaching this school year.
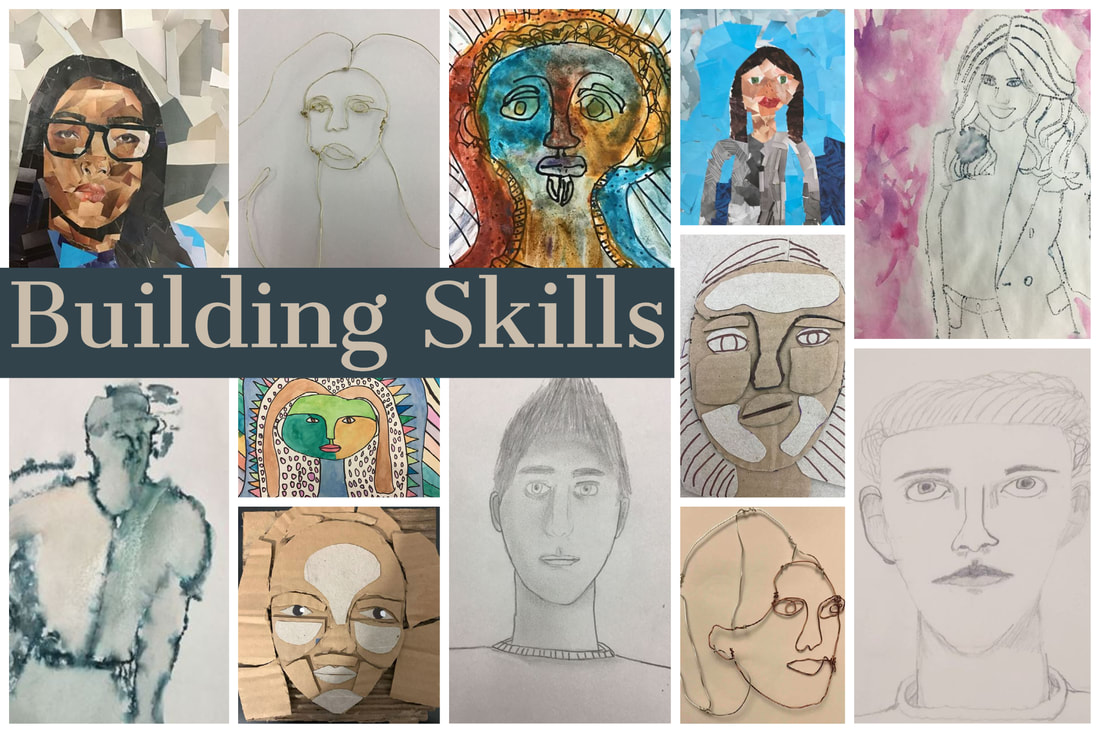
Our school decided to start the year in a hybrid model, but it was very much a back and forth for weeks worth of meetings before landing on that option. To save myself from the inevitable stress of trying to figure out how to teach half of my students in person and the other half at home, I decided to plan everything like we were learning remotely this year. That way it works no matter what the learning situation is for a student and is stable and predictable for students, parents, and me. I took some of the things that worked best during remote teaching and learning this past Spring and added some additional ideas, tools, and other things, too. There were still some problems I had to find solutions for, and for the most part, I think I have. So, one BIG hurdle I had to figure out how to clear was organizing ways for students to get a chance to learn a variety of media. Usually, if I wanted to introduce a media or concept to students, we would do a round-robin experience of students getting to use the media (often in partner work). Now we have to do it in a way where we did not share supplies and it was safe. The solution was the interactive skill builder you see below. This tool (made with Google Slides) allows students to select from a variety of choices and create work that will help them gain and build skills. In addition to picking one from each set, students took notes on all concepts in case they might use them later. This skill builder is a lead-in for our first challenge, which many students create portraits or images of people because of the theme.
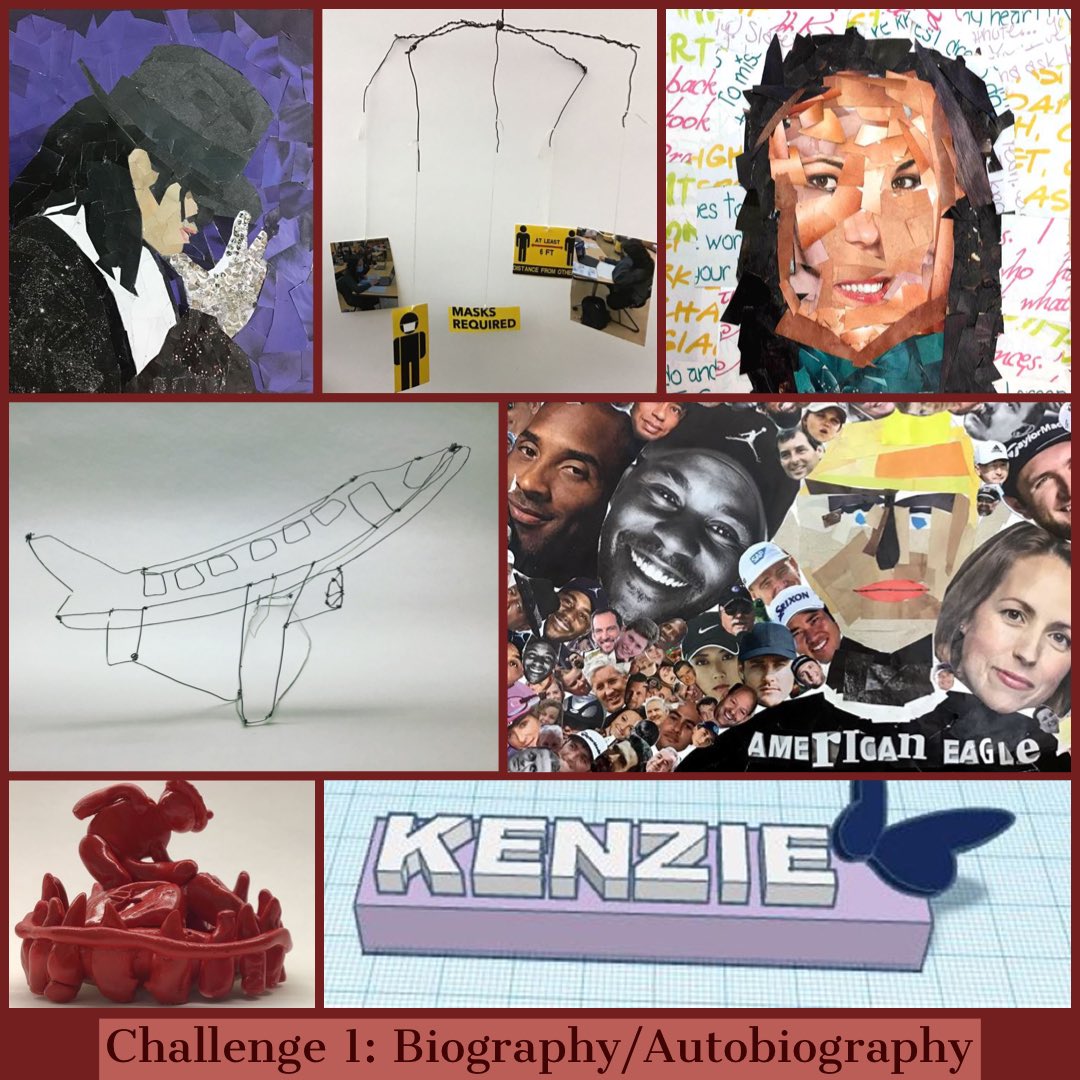
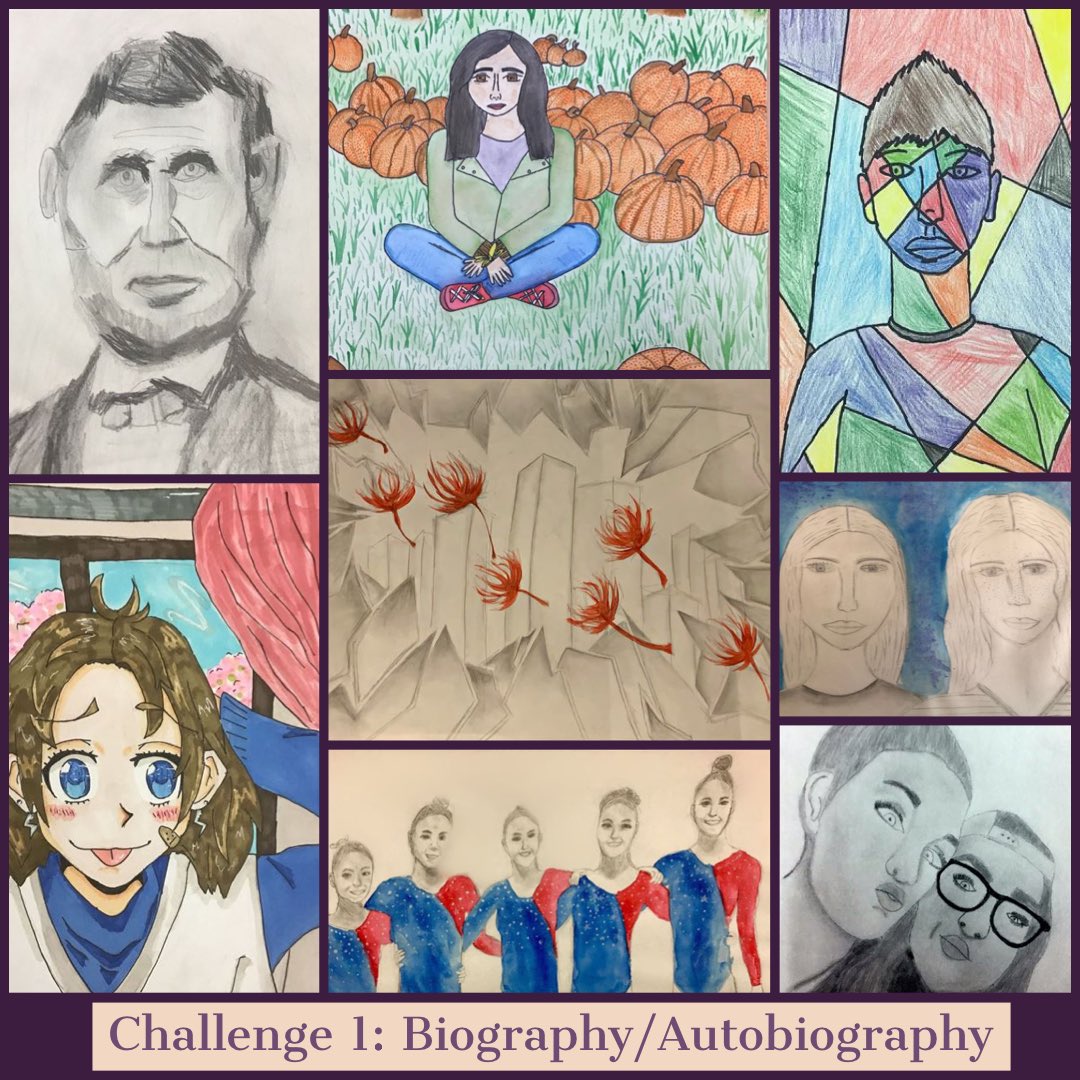
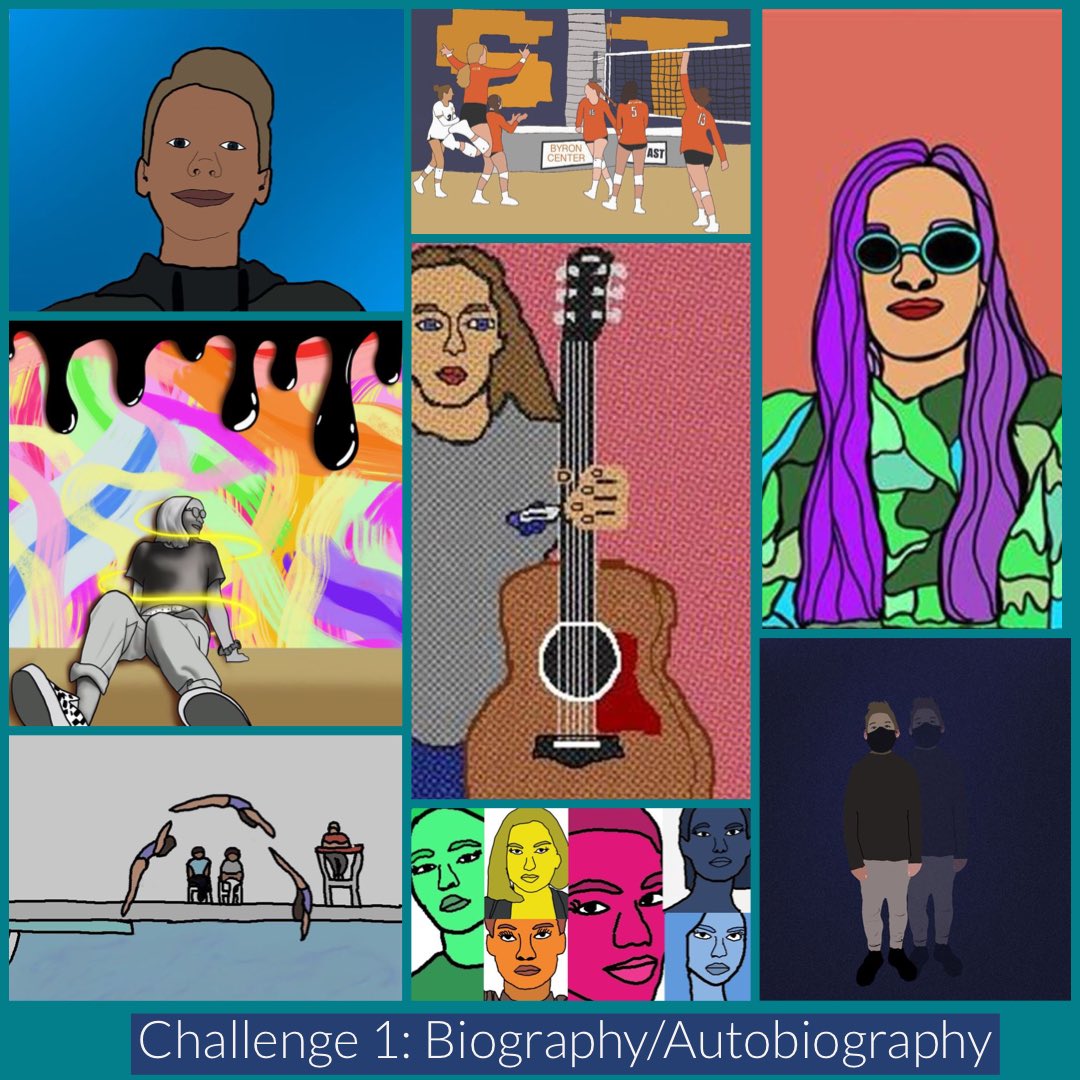
The below images are examples of what students made during this skill builder. It was such a nice variety of works and the choice of what students got to use helped engage all learners.
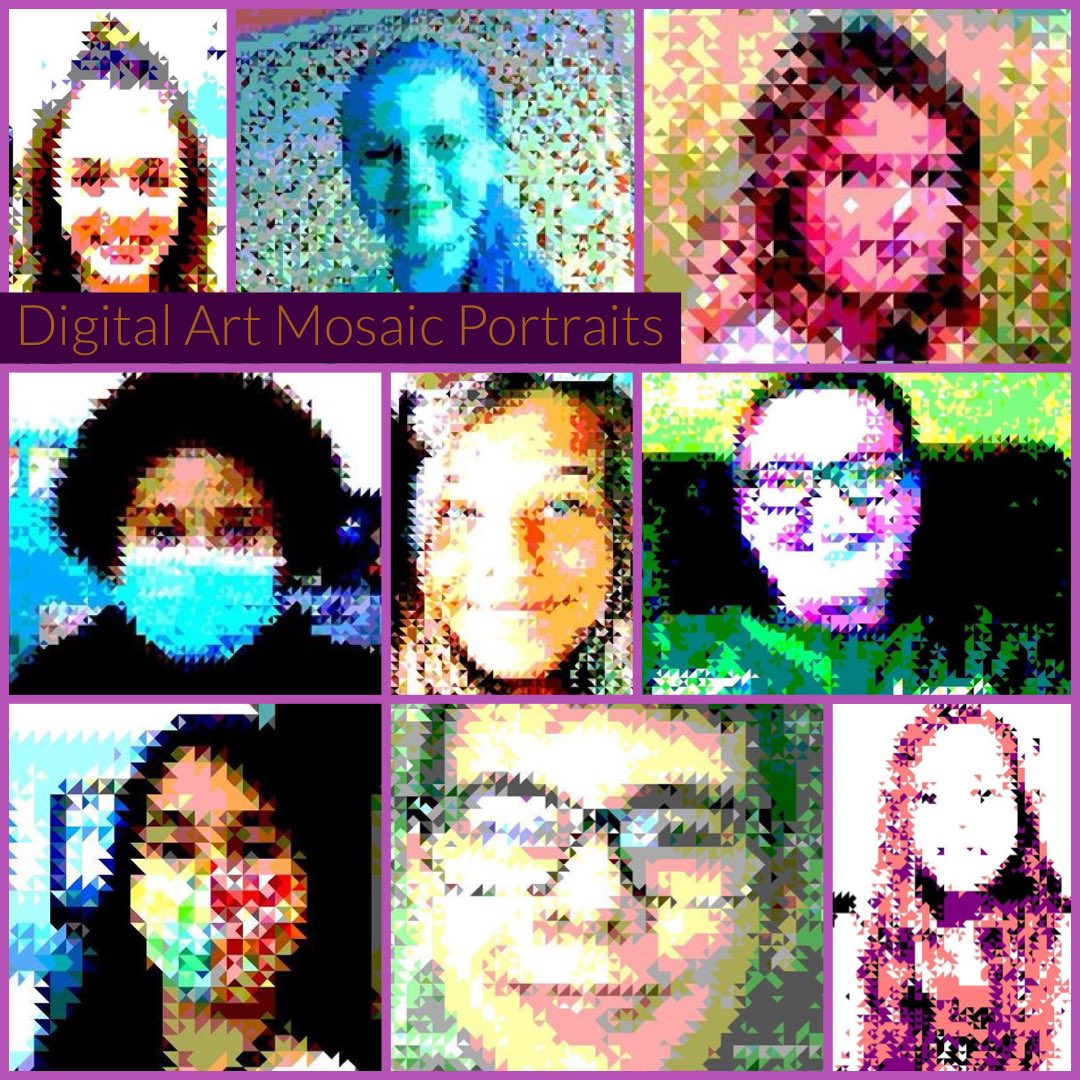
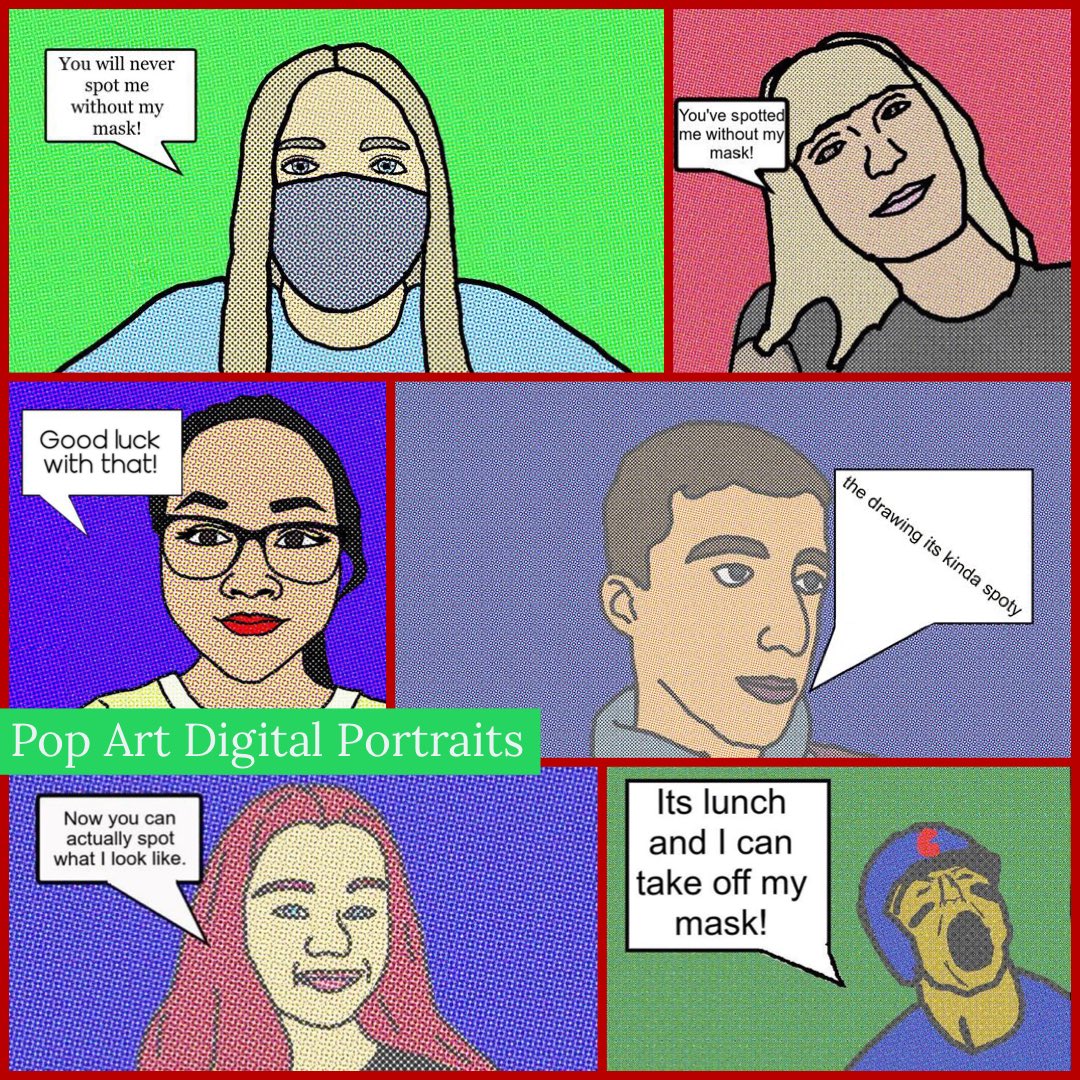
After completing our skill builders (which happened to be our last week of hybrid instruction), students returned to start the Digital Art Bootcamp. This again offers some choice and sets of key terms for students to know and understand. Students could select what to make based on their ability and skill level and what they wanted to learn.
Below is the board we used to complete this:
As you can see, the portrait was still a main subject because it helped students prepare for what our next activity would be: planning for challenge one.
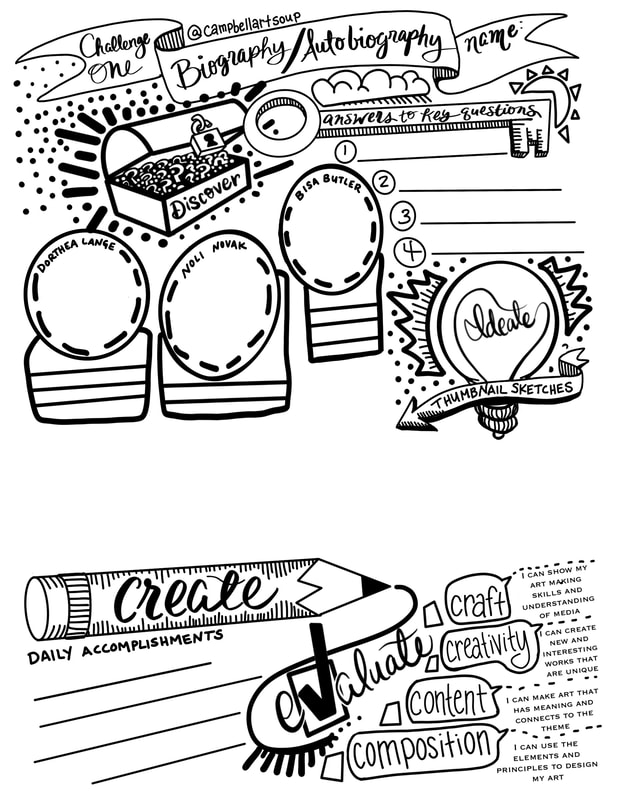
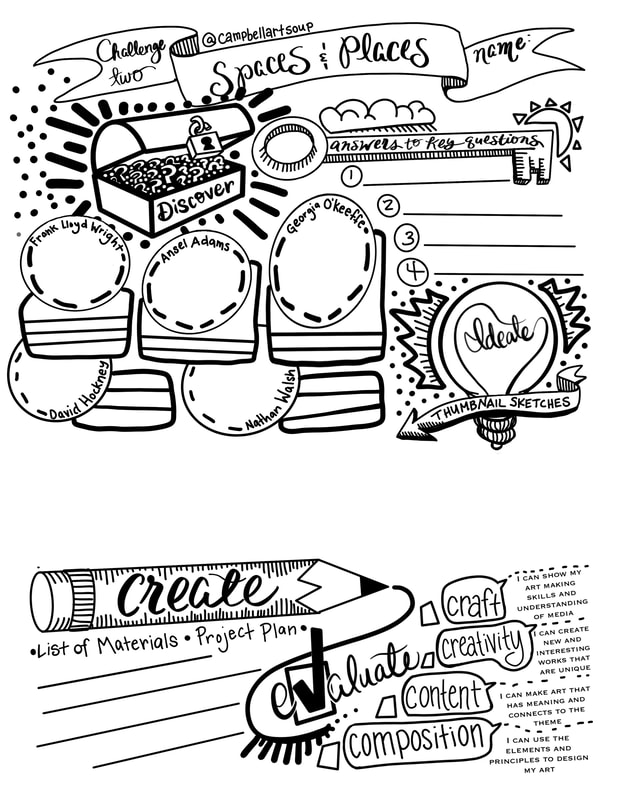
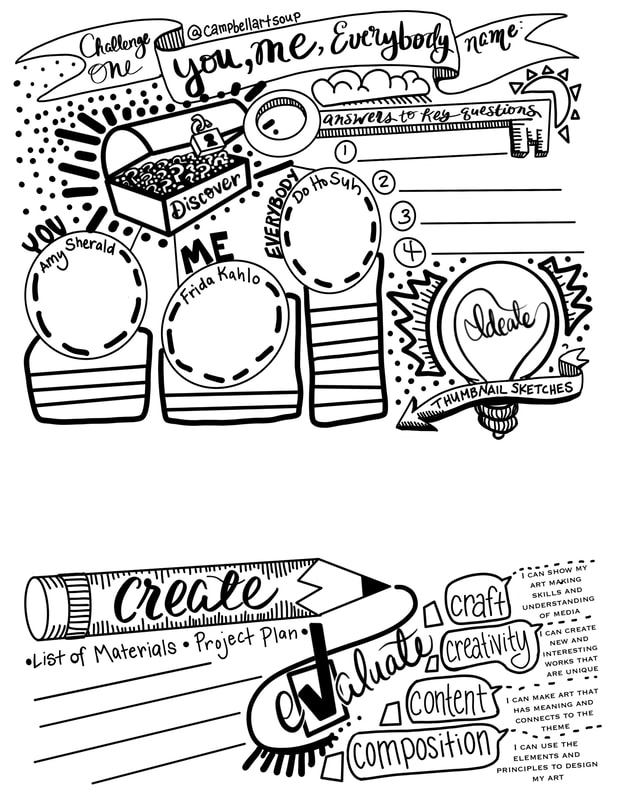
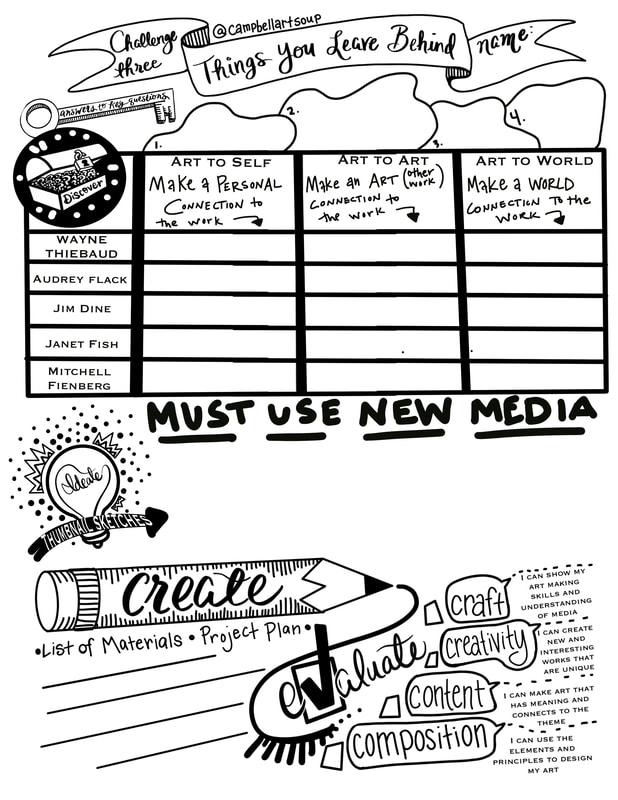
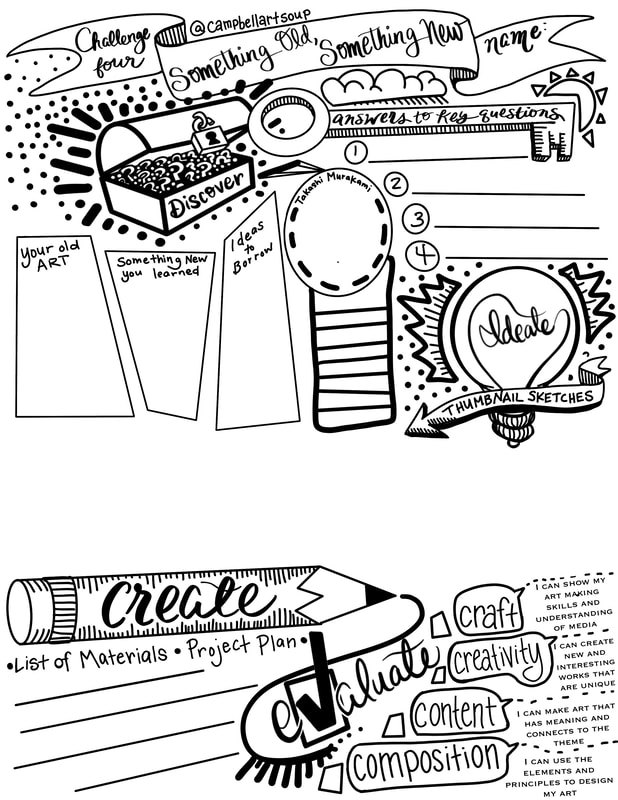
Starting last year, I designed planning guides for each unit that used the Design Thinking Process as a way to organize information from the unit. Every Challenge we do has a set of artists that explore a common theme, key questions that focus on the theme, a series of thumbnail sketches students use to help gather ideas/feedback to create their work and a place to track their learning and check for understanding. The guide below and presentation that go with it show how I have adapted these to fit this year's situation. The presentation is much more interactive and allows for students to revisit what they are learning about as they need to throughout the process. Start clicking on it and you will see what I mean.
The result of this overall, revamping of what I have been implementing into my classroom for almost the last decade to meet the safety needs of today is what you see below. Students making work that is uniquely theirs. Inspired by artists, but not copying, while picking and choosing skills they want to employ to implement to create a wide array of pieces that are connected by being works that look at making art about themselves or others.
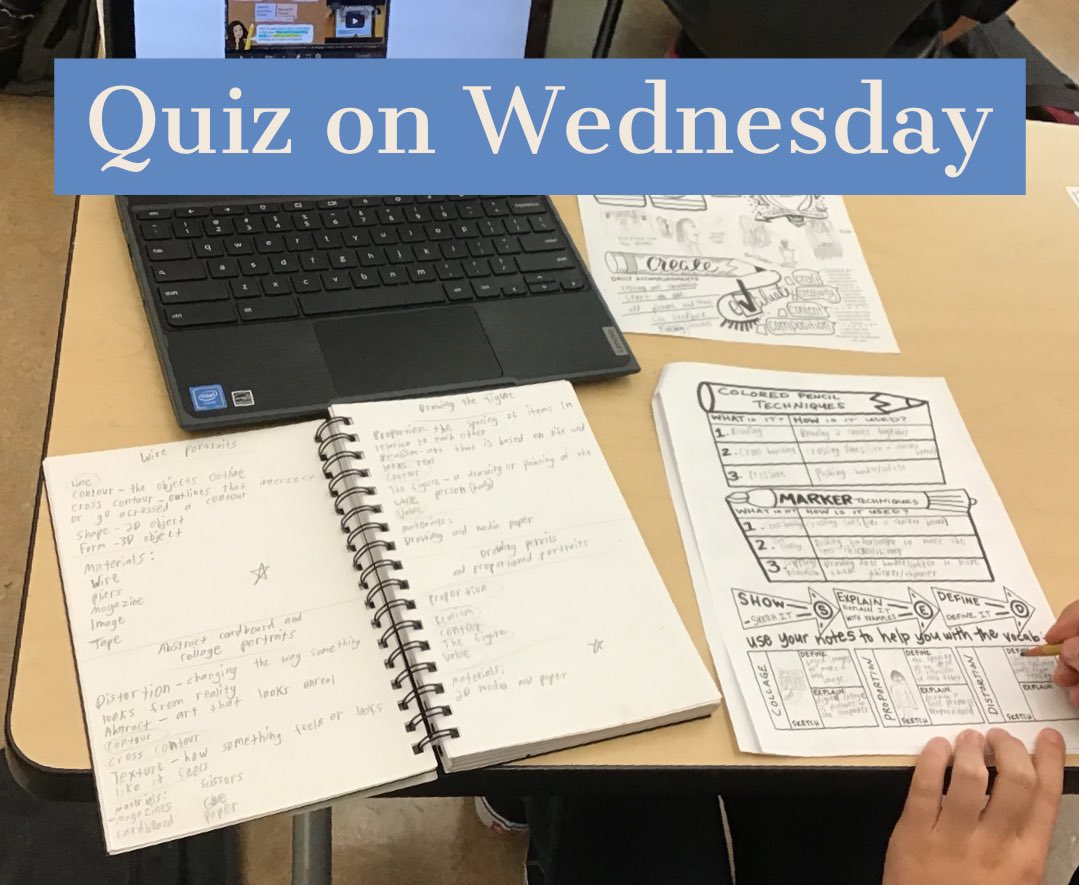
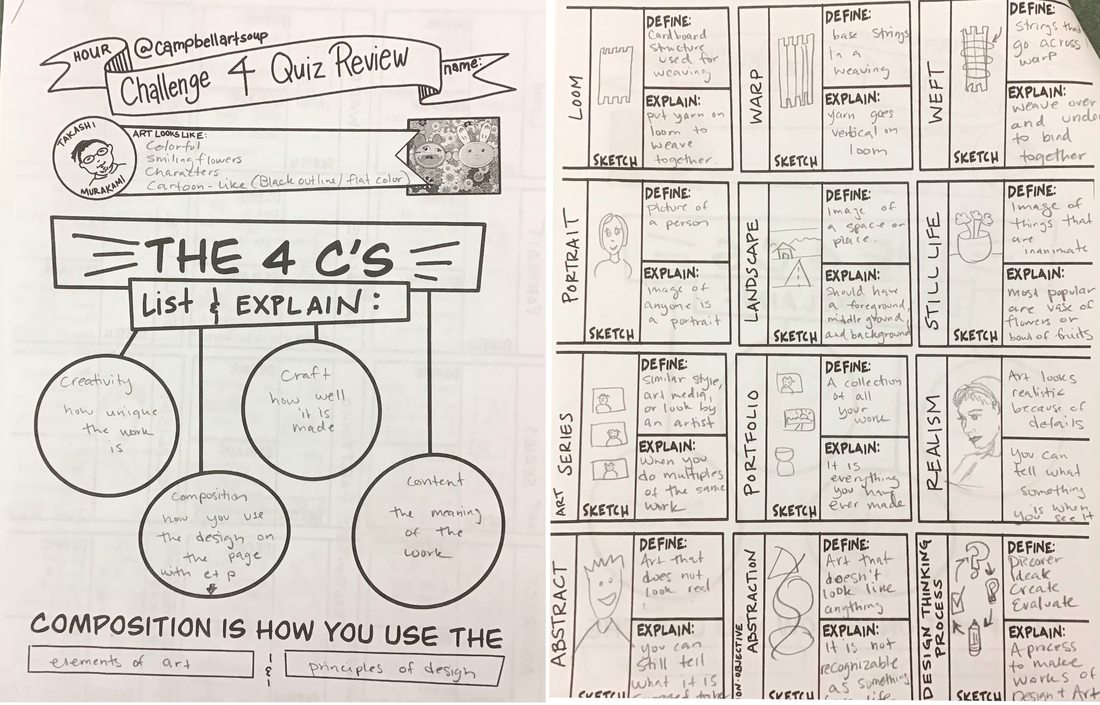
Once this work comes to a close, we cap everything off with a quiz that assess understanding of skills and concepts from what they have learned. People are always a little shocked when they learn we have quizzes in art, but it is a great way to see what is being retained. I always give a review guide for students before so they can organize their notes and understanding in one place.
It is my 17th year of teaching and I am most definitely not claiming to have it all figured out quite yet and probably never will. What I do know if that I have had the chance to spend the last 17 years teaching the same grade level and subject area so I can get to this place with my students.
I have had to make a lot of adjustments (many I can't wait to be rid of and some I will keep post-pandemic). Even with all of the restrictions and safety protocols and having to cut some things I would normally do with students out, it has been reassuring with this work demonstrating that we never have to cut out the creative voice offered by each individual student and we have managed to maintain a level of quality that I am still amazed at looking back on with what we have done so far this year. If you want to see more from my classroom, check out my Instagram and Artsonia galleries.
When we first found out that we would all of a sudden be moving instruction online and no longer be teaching in a way that I have only ever known (as both a student and teacher), I was a bit frozen with fear. How could I still connect with my students, teach them content that was both rich and relevant, as well as help them work through any feelings they may be going through, using art as an outlet and uplifter during this unprecedented time.
I had a choice to make: completely overhaul everything and start anew or stay the course and keep moving forward using the processes, units, and activities I would have done if we had been face-to-face. I chose the latter. I was lucky in that I had already had my students in the art classroom for about a marking period of time and they had taken STEM the semester before, so they understood the process from which we could follow to create the works we were going to make. Design Thinking is something I have shared before and it has helped me shape my classroom into a place where students are able to make choices and stay organized and focused on results they are interested in obtaining. Finding ways I could adapt this process to teaching remotely was a challenge, but as you will view in the video, it was worth it. Introducing Design Thinking to Students
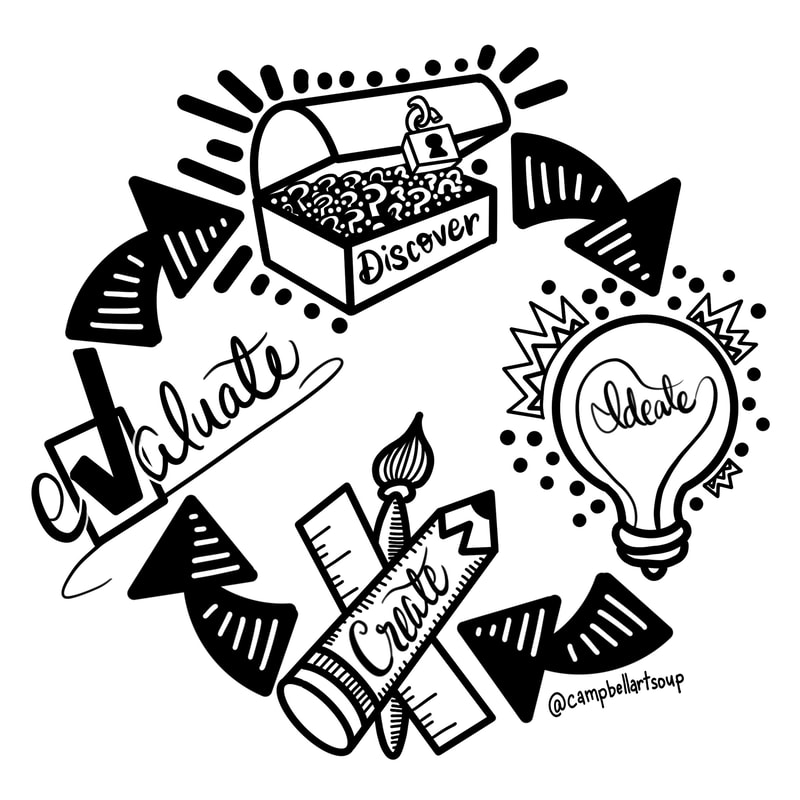
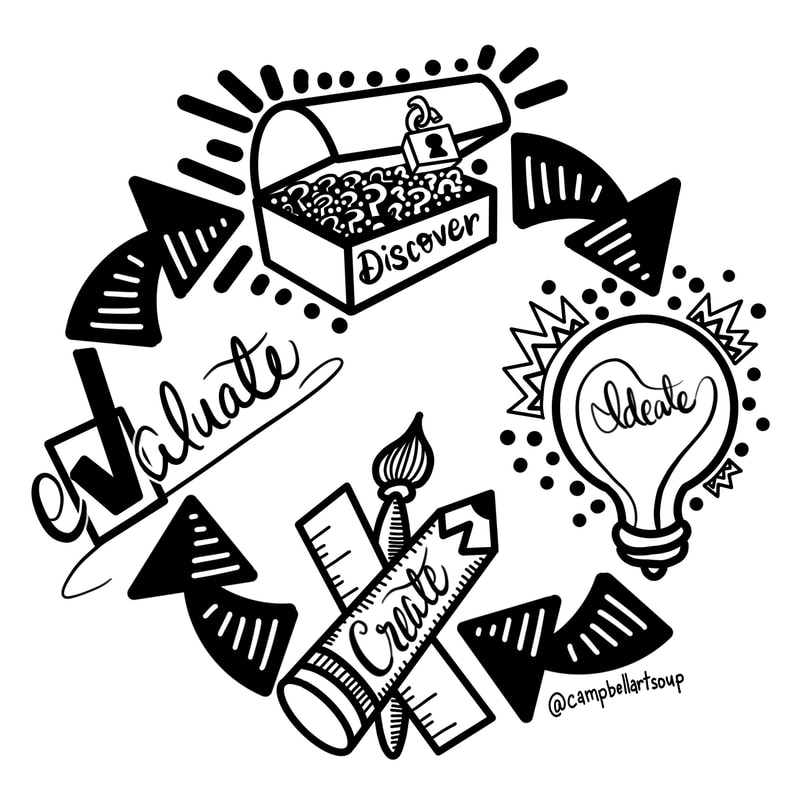
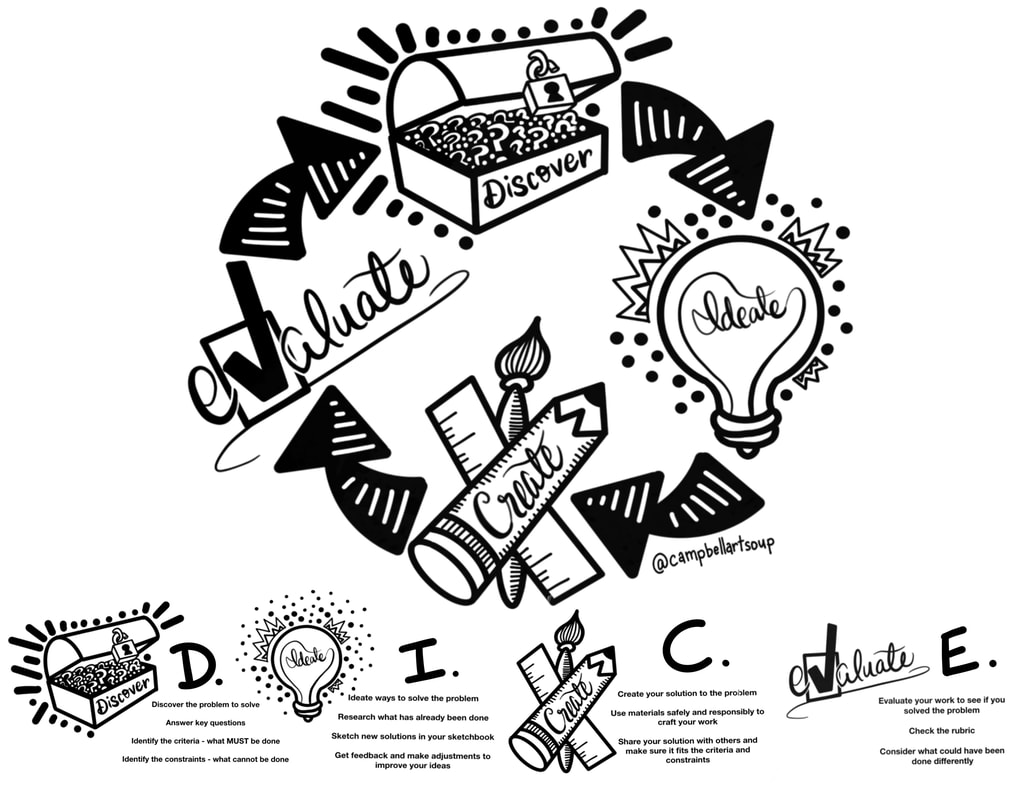
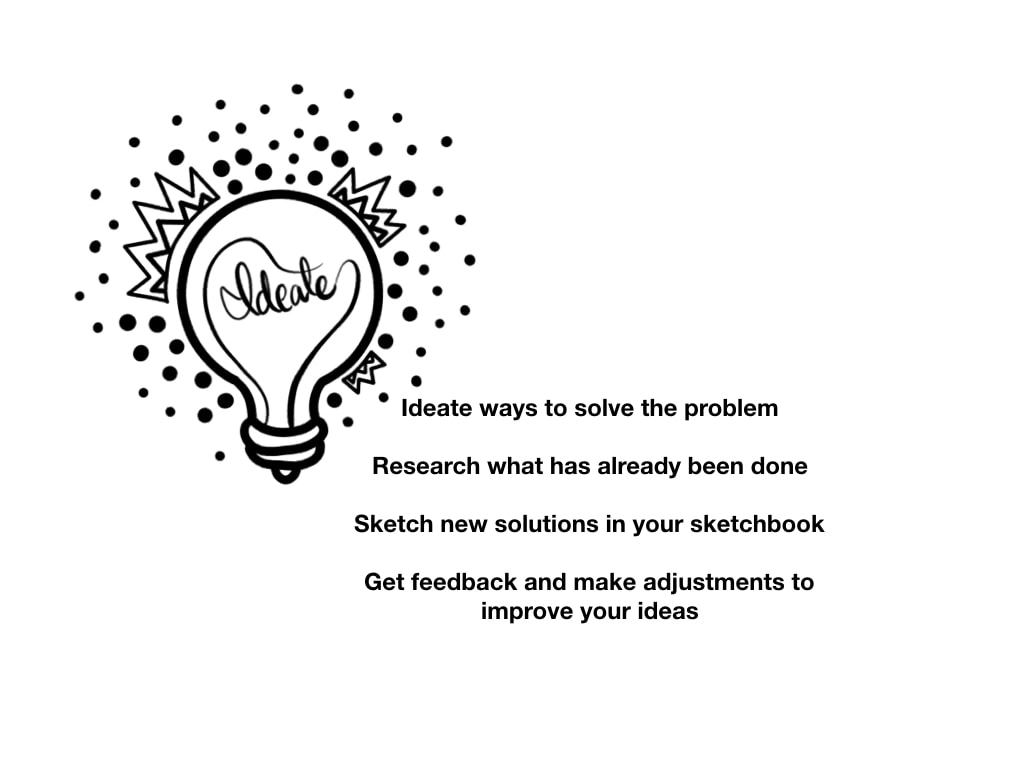
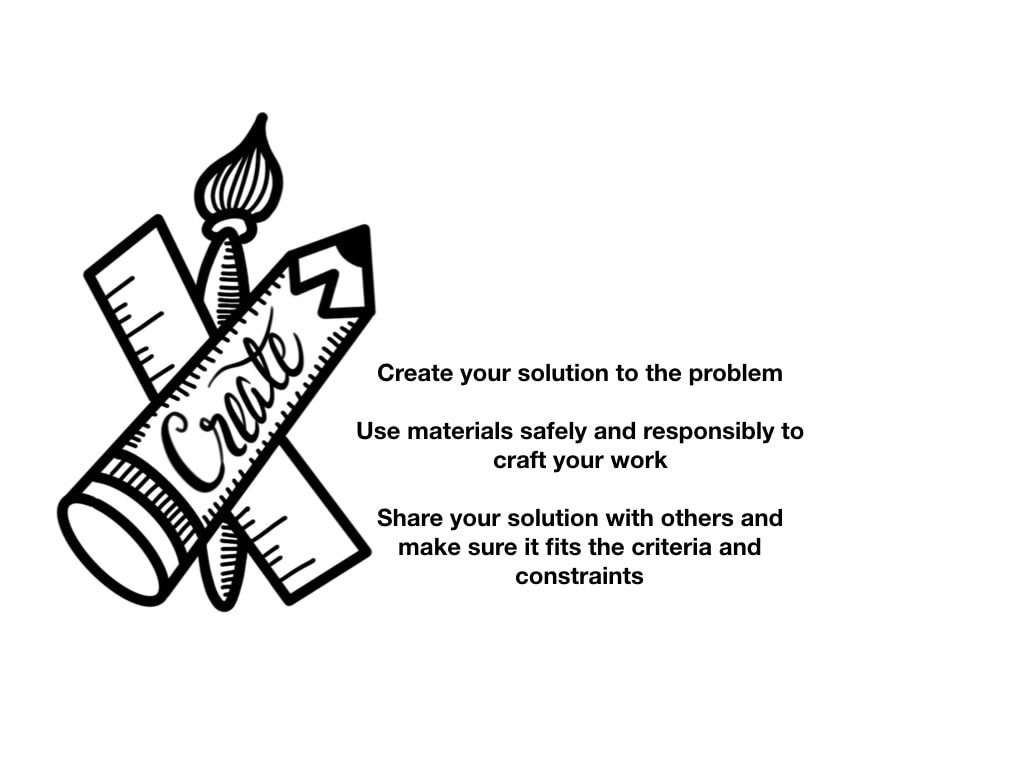
The graphic above is one I made last summer using the iPad app Procreate and my Apple Pencil. I had been using Design Thinking for years before coming up with this visual representation and now that I have it, I feel even more strongly about how important this organizational tool is for me and my students as we navigate the work created in the classroom (even when done remotely).
By having a graphic to show go along with each step, it helps me better communicate to students the how of what we do when we try and solve visual problems. This can also be applied to other content areas (I see a lot of overlap with Science, for example) and it has been an awesome thing to share with my teaching partner in the STEM room so we can use common language about how we are going to help students walk through the work they do in our classes. Organizing Thematic Units
I consider my classroom a choice-based place, meaning my students have the opportunity to decide what materials and processes to use when they create their final works. We work within a broad theme and use DICE as a way to organize the process.
Usually we have enough time during the semester to cover four unit themes. I use the same theme for both 7th and 8th grade, understanding that because students are getting to select what and how they make their art, the results are always going to be different and the units change year-to-year. This year our themes were "You, Me, Everybody," "Spaces and Places," "Things You Leave Behind," and "Something Old, Something New." These themes allow me to cover some recurring subjects you will find in the work of artists like portraits, landscapes, and still life as well as focus on students demonstrating growth through a review of their Artsonia portfolio and reimagining what they had created before through the new lens of what they now know and can do. Each theme has a set of artists we use as reference who come from different backgrounds and use different media to address the topic and students also have a series of skill builders and bootcamps they complete to get a better understanding of art concepts and media they can then select from as they complete their work. By moving to a thematic structure that offers choice as a result of skill builders and mini lessons that give a variety of tools to use, students come up with dramatically different results that help them establish their own unique voice while also showing me they know and understand what is being examined through the process of creating the work. Here are some examples of the planning sheets I use for the themes we covered and continued to cover, even when moving to remote learning: Assessment for Learning
For each of the challenges, I also created review sheets that students could use to house the information they learned in that unit and then we would have summative assessments based on that. In addition, students had standard-based rubrics that guided them through their creation of their works and artist statements when they posted to Artsonia (all of which fell under the category of the 4 C's when evaluating art: Creativity, Craft, Composition, and Content). Finally, students had the chance to be reflective of their own learning through a series of self-assessments, too.
All of these components offer a chance to assess learning through lenses of what students were able to learn and retain through application, what students were able to produce and communicate through application, and how students felt about the learning, production, and application of the processes selected. I am still working how summative assessments, like quizzes the reviews were used to do in my face-to-face class, would work or look like when teaching remotely. Right now, I use the assessment feature on Schoology for this and hope to be able to adapt that to whatever our system looks like in the fall. If you are interested in a closer look at the final exam review I offer for students, you can check out the file below:
Looking Ahead
I am already planning for next school year. I am thinking about the themes we will cover and the artists we will reference. In addition to making sure I plan for ways to integrate the Design Thinking process within the way I teach Visual Arts remotely, I am also preparing myself for the potential that I will not have the same luxury I had this year where students were able to learn it face to face from me to start so we could continue it online.
One way I envision myself organizing my online space is through the use of Google Slides and through the "Bitmoji Classroom." I also am really excited about SildesMania, where there are a lot templates that can be used for this and are offered for FREE!
I also have been working on a series of works using Procreate on the iPad to illustrate images of the artists we reference in our classes. I started this during our stay at home order to better hone my skills with a tool we use in class and I am planning to continue it to complete the series for next year's set.
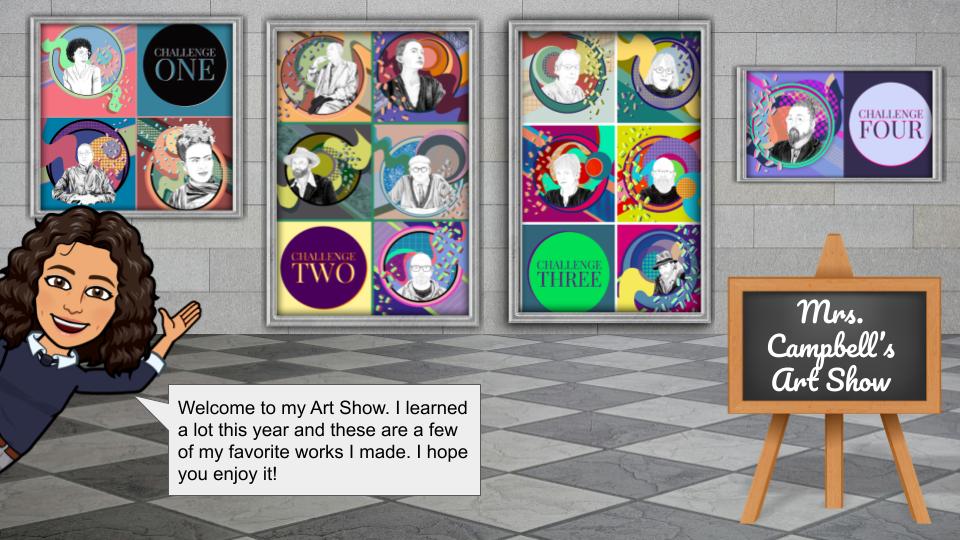
I envision having something like the image you see above, which was created using Google Slides and allowing the images to be clickable that would then allow students to learn more about the unit. I am also working towards more diverse representations of artists we use as reference in the art classroom. People from different backgrounds and countries should be represented. This is something that is really important to me because I am a child of an immigrant. As an Arab-American, I have grown up experiencing and continue to experience what it can feel like to be seen through a limited lens. I share this because it is important to seek understanding within ourselves and each other and grow in the process. Being mindful and purposeful of inclusion when seeking out which artists I teach will help me be a better teacher. And seeing art made from different points of view helps us understand the world in new ways. I am excited and nervous about a new school year. There may be a lot of unknowns, but what I do know is I am so lucky to teach who I do and where I do and I cannot wait to get working with my students once we do start up this August!
As with most things this semester, I have been inspired by other teachers and used past lessons to mash up ideas of what can work for students as we learn together, while a part. Every end of the semester, before saying good-bye to students, I like to offer a multiple-part final reflection/exam that asks them to use digital tools to demonstrate and reflect on what they learned this semester.
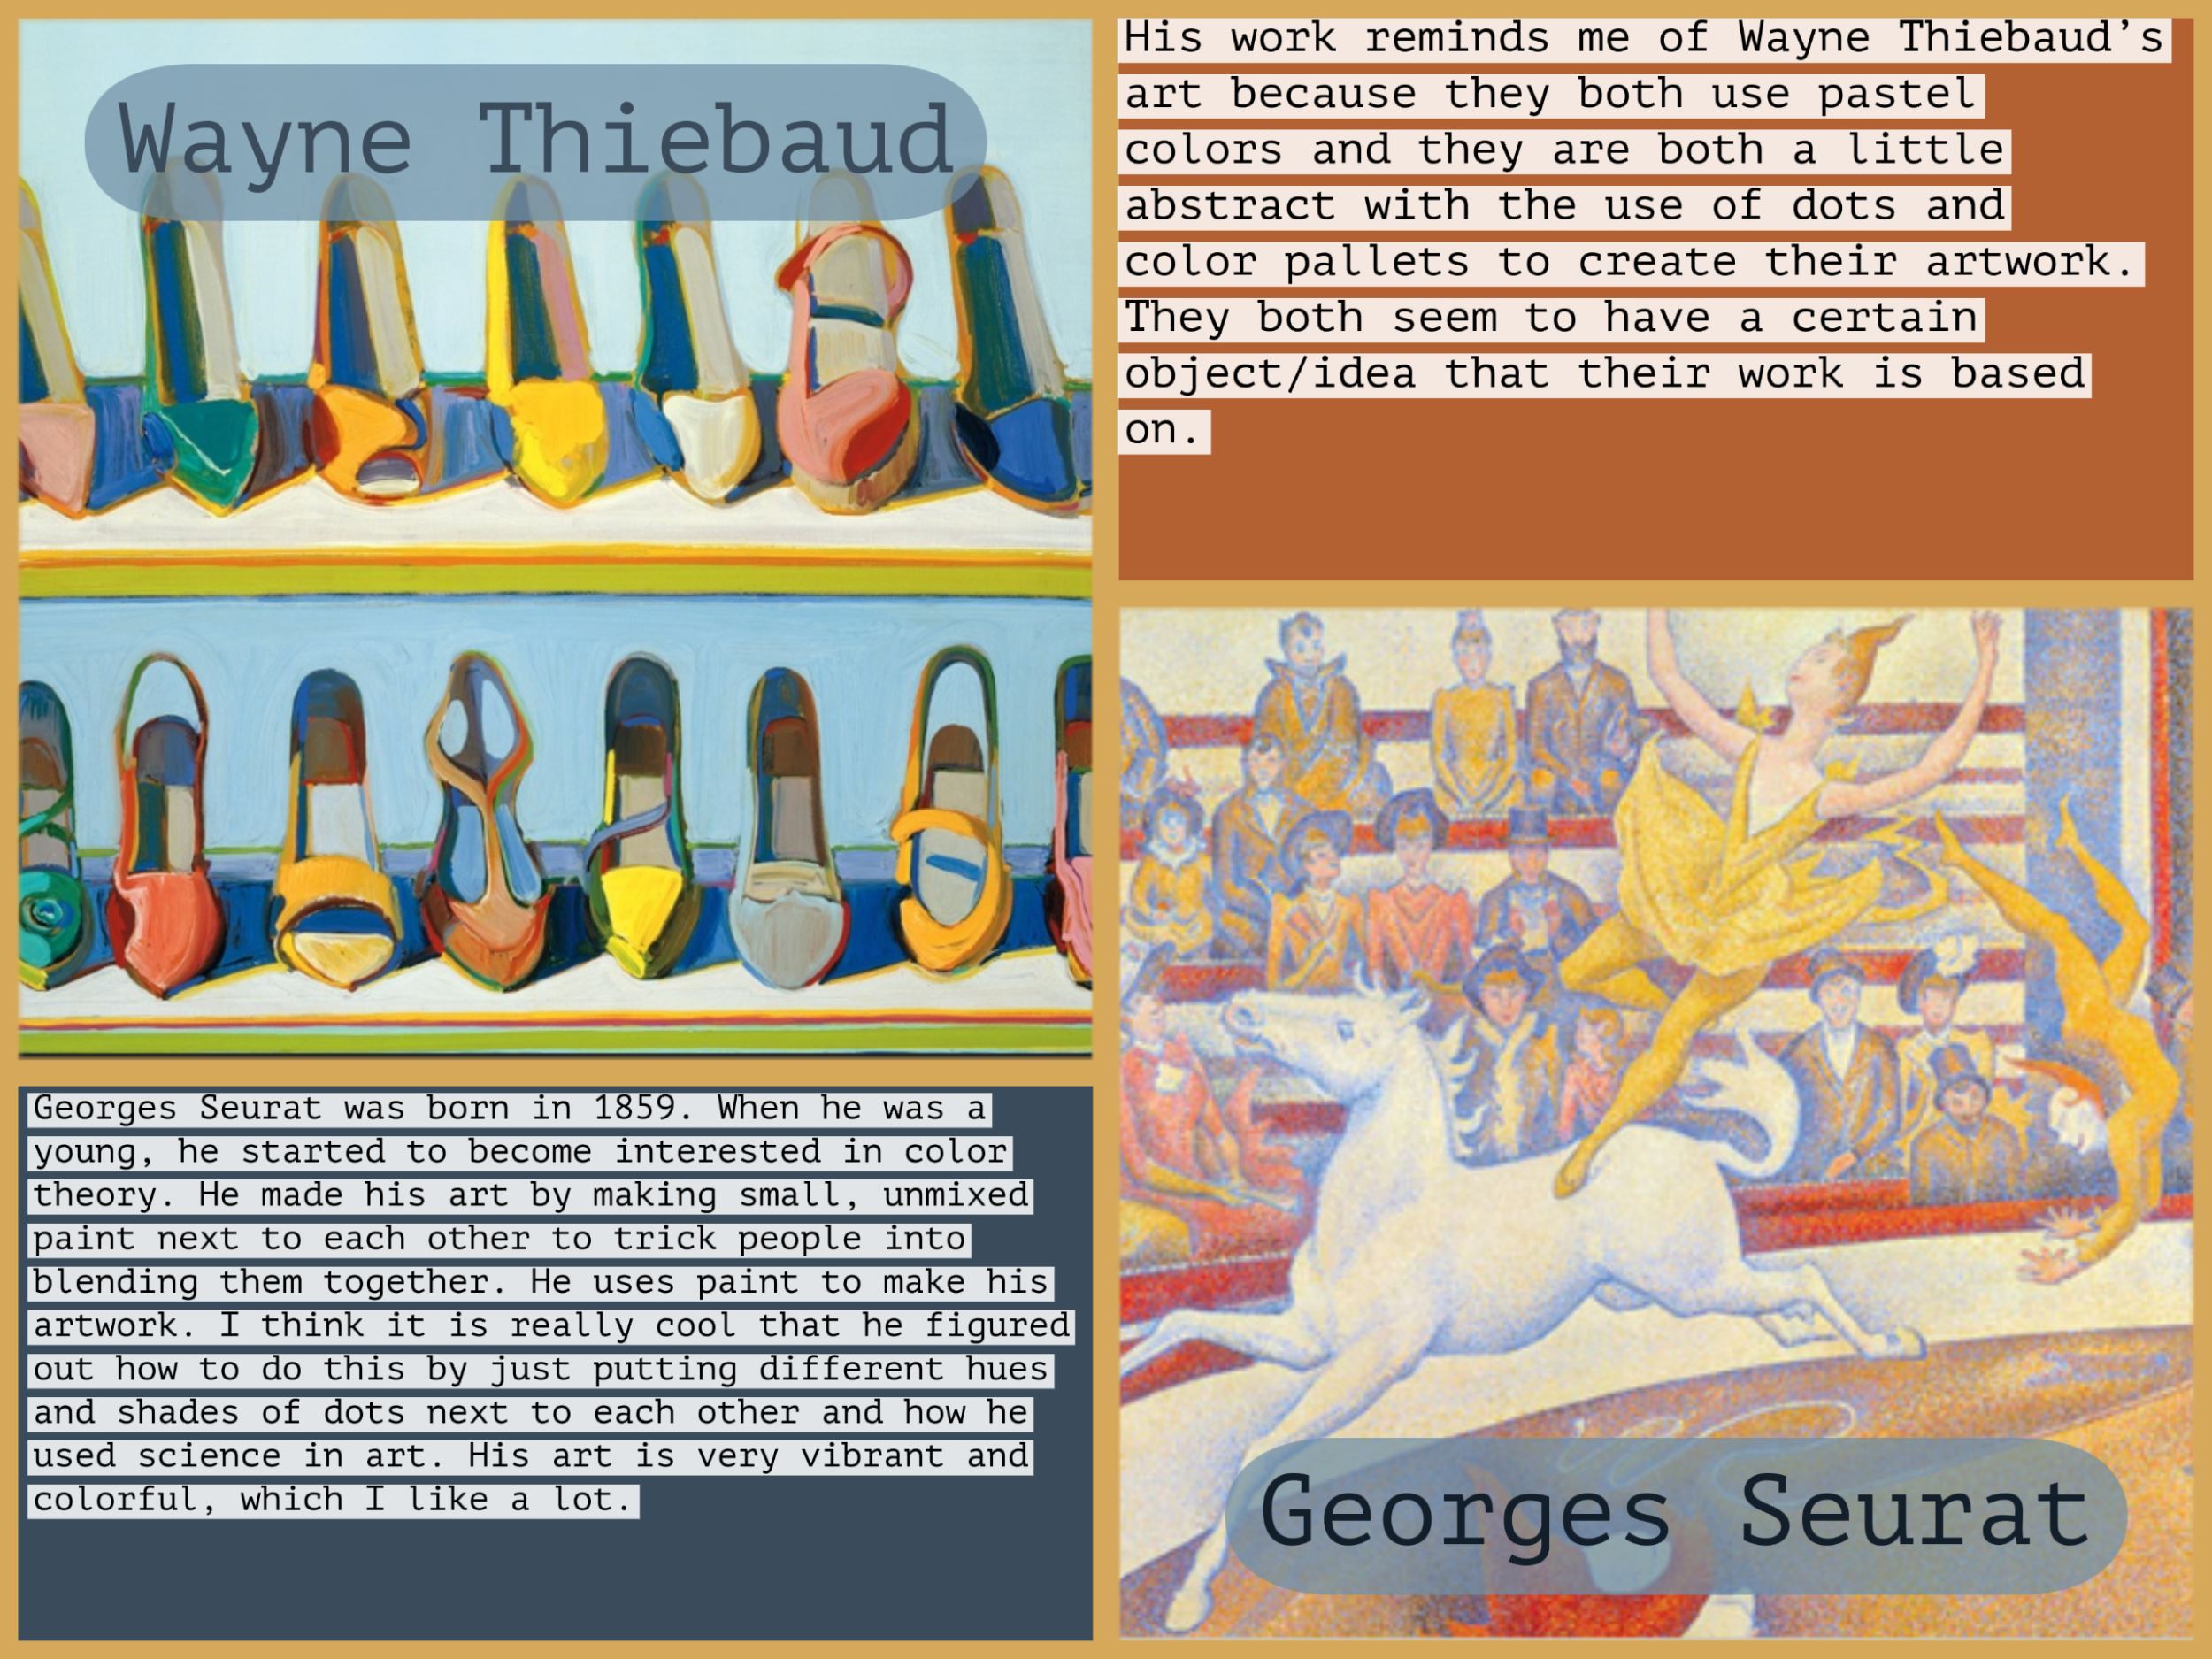
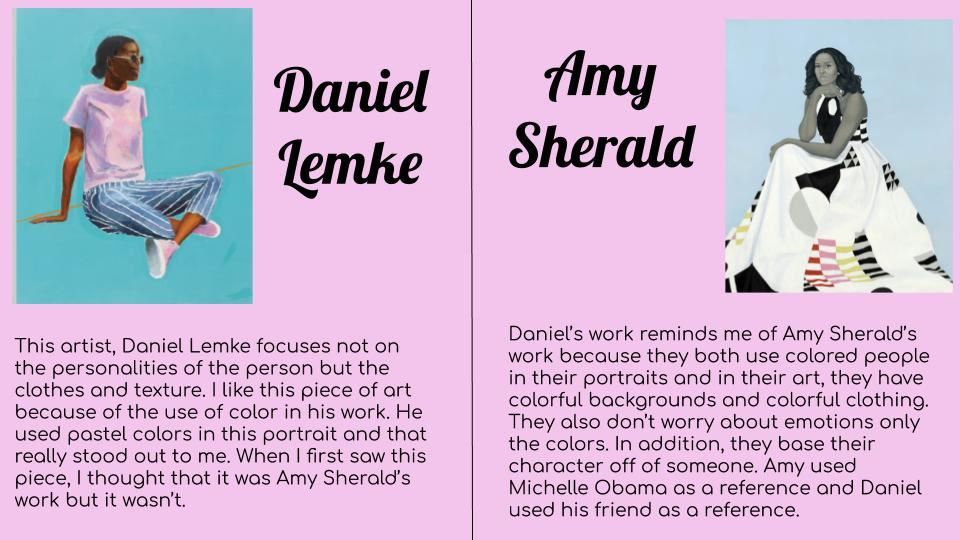
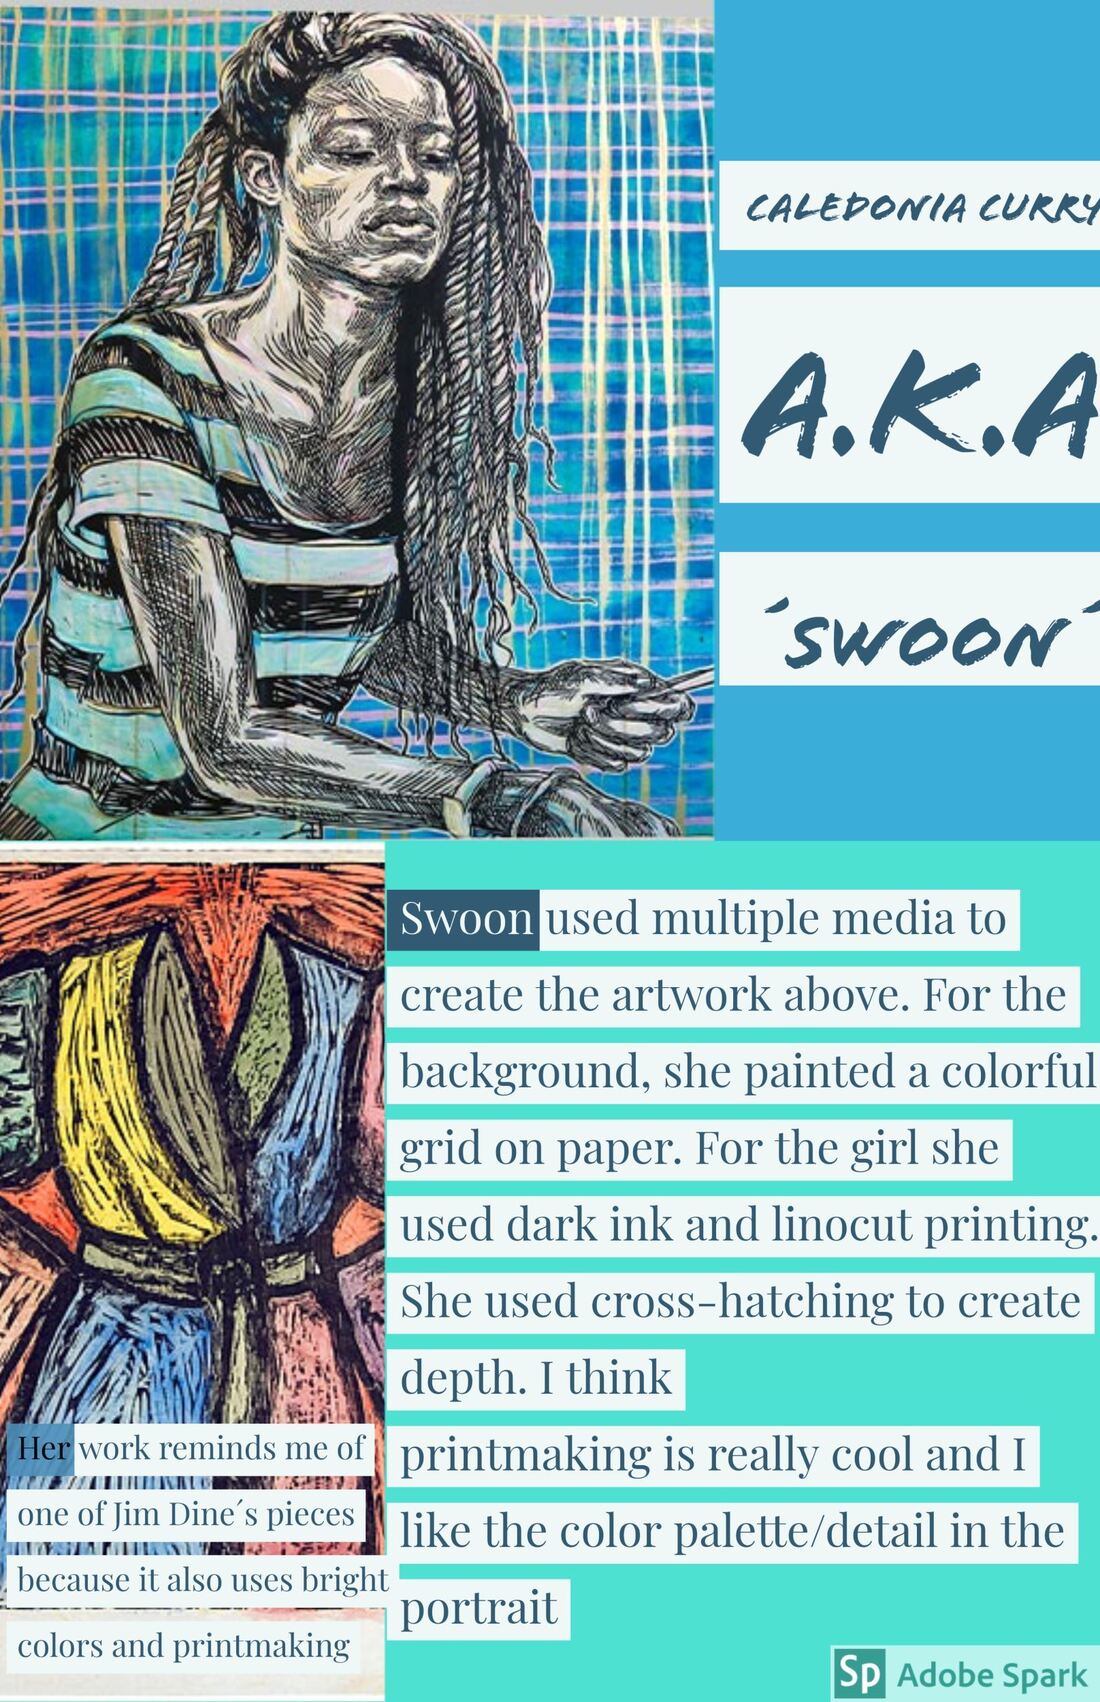
To finish out this semester, we continued that approach with a digital poster and virtual gallery. The digital posters ask students to take an artist we studied this semester and select an artist from Scholastic Art Magazine to make a comparison to using either Google Slides or Adobe Spark. In doing so, it gives students the opportunity to look back at what we have learned and then make connections to what they select from the magazine to showcase that learning. Here are a few student examples:
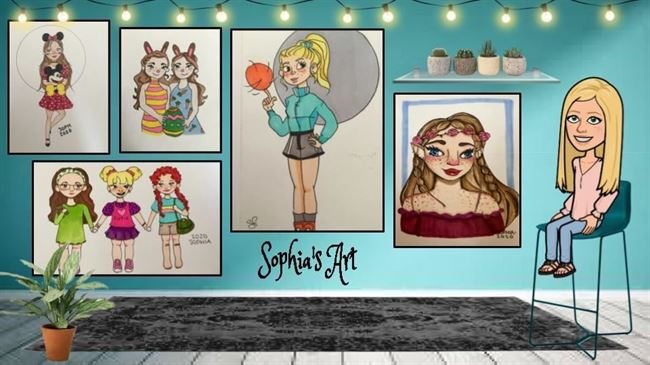
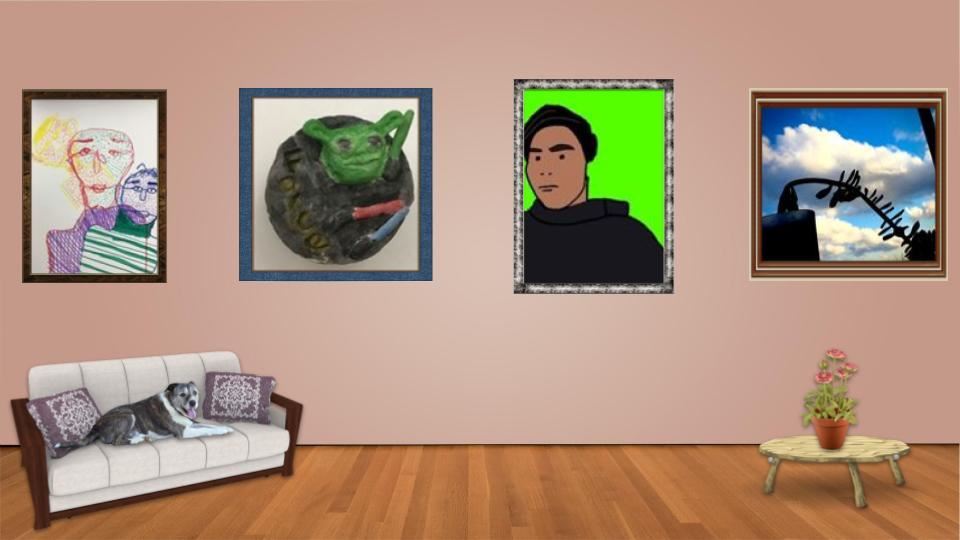
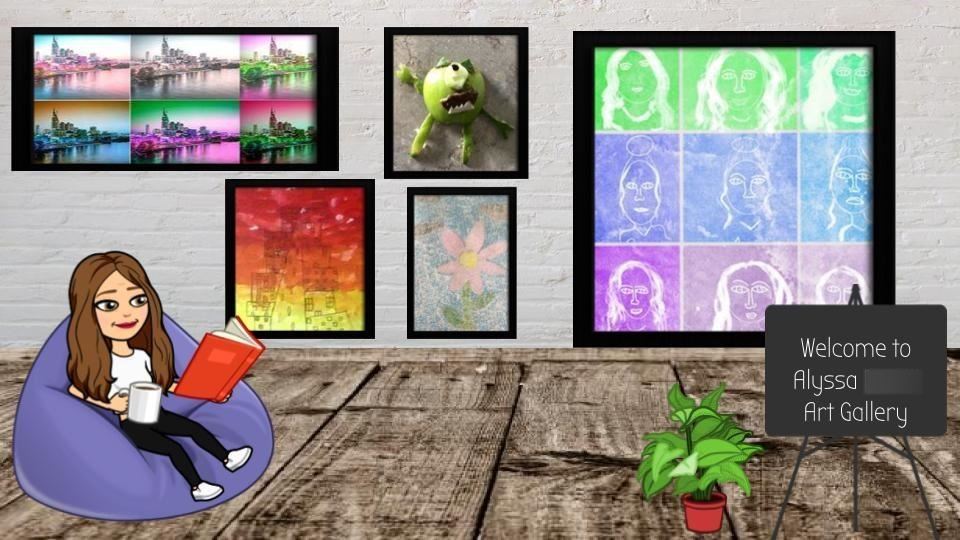
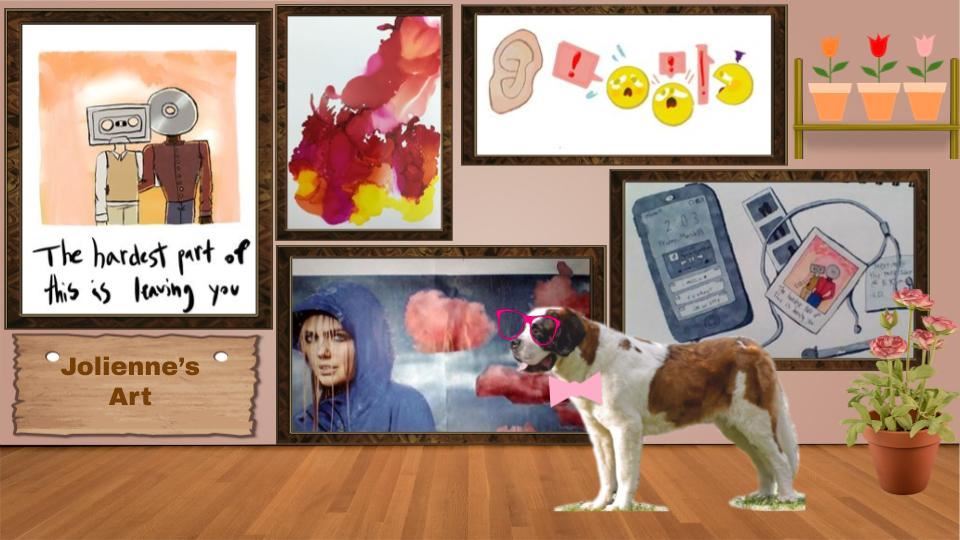
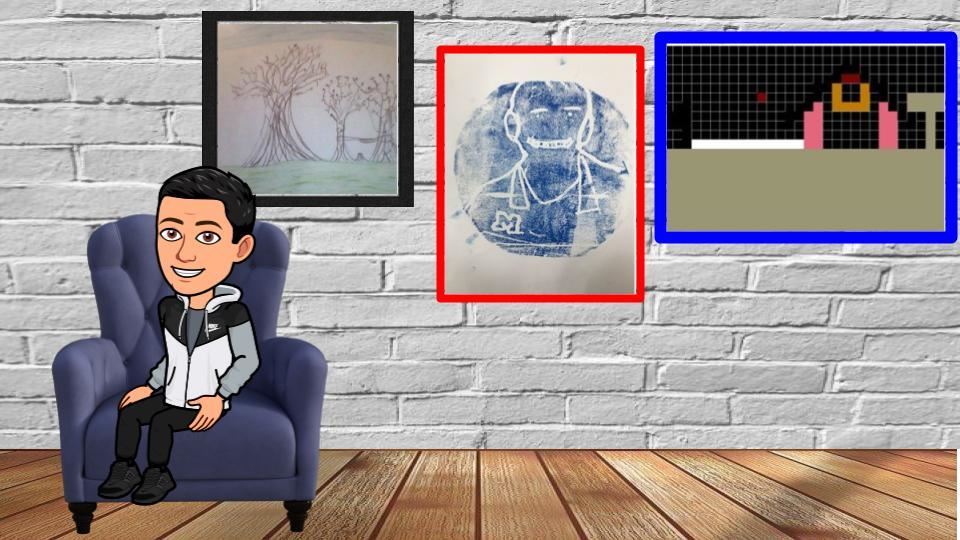
For the second part of the final, students are asked to create a virtual gallery of between 3-5 of their favorite works using Google Slides. Students then save the slide as a JPEG image and upload it to Artsonia, so we can put it into our final art show for the school year.
Here are some of those results:
Overall, this end of year activity is bittersweet.
I am so proud of how well these students have jumped on creating this work, but so sad we cannot be back in the classroom to do it. I will definitely do this again in the future. And introducing the lesson using the published slideshow below was a GREAT way to share it with my students and get them engaged in the lesson. You can click through the presentation below to see how to make both items!
As I move forward in this new way of connecting with students, I plan to use this publishing function of Google Slides so that the remote learning lessons are more inviting (rather than just links in a folder).
I even used it to celebrate our students for the end of year art show, too!
I hope everyone has a safe and great summer!
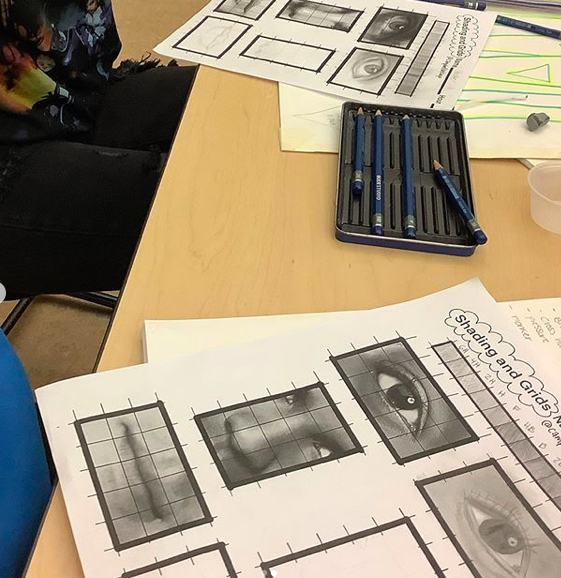
I will be spending some time in the coming weeks, posting work from my classroom this year onto this space. If you find something useful, use it and give me a shout-out. Hello Everyone! For those of you who have followed me for a while, thanks for the support (even though I have been distant recently). For those of you who have never visited before - WELCOME! My name is Janine Campbell and I teach in West Michigan. I am originally from Flint and visit my hometown often (The Flint Institute of the Arts is my all time fav). With the recent school closures, it has been a challenge and opportunity to get some things posted that I have been working on for a while, like this grid value exercise. I used this with my 7-8th grade students, but it could be used 6-12th grade without hesitation. The video has no sound, as it is just a demo on how to use value and the grid to create an image. If this is helpful for you or your students, please USE IT! I have ten variations I made on the Procreate Drawing App on the iPad and those are attached below. Students did this a few weeks ago to help discuss value and facial features and the use of a grid to translate an image onto another surface. I have said I would be sharing this when I had time to get a post together - well, I got nothing but time for the foreseeable future, so expect more things like this as the days and weeks roll on... If you found this helpful, please share on Instagram or Twitter and tag me using @campbellartsoup. It fills my heart with so much happiness to see that something I have made is helpful to someone else. Take Care and Make Art!
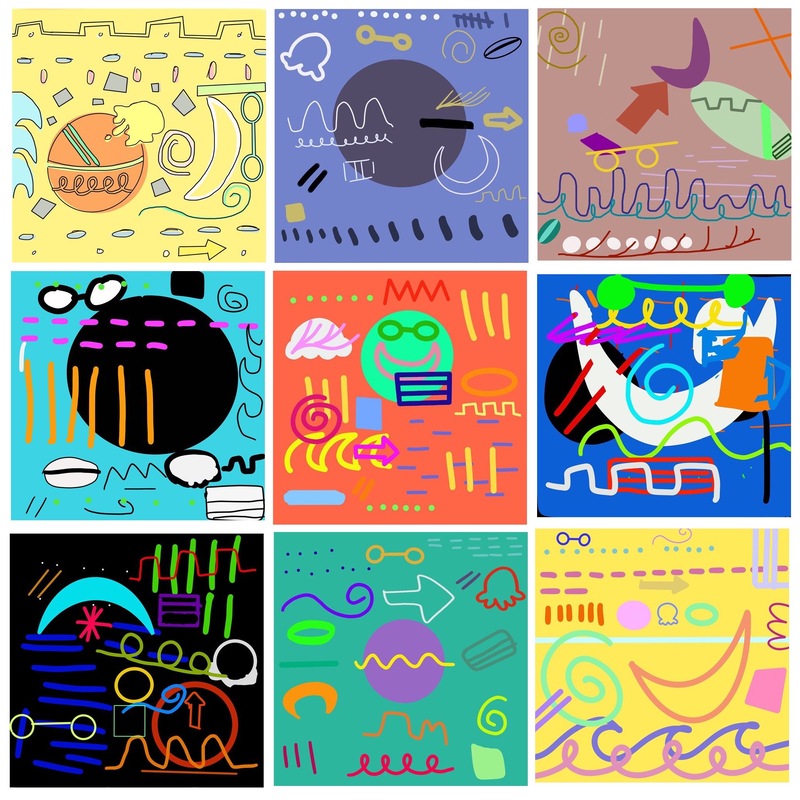
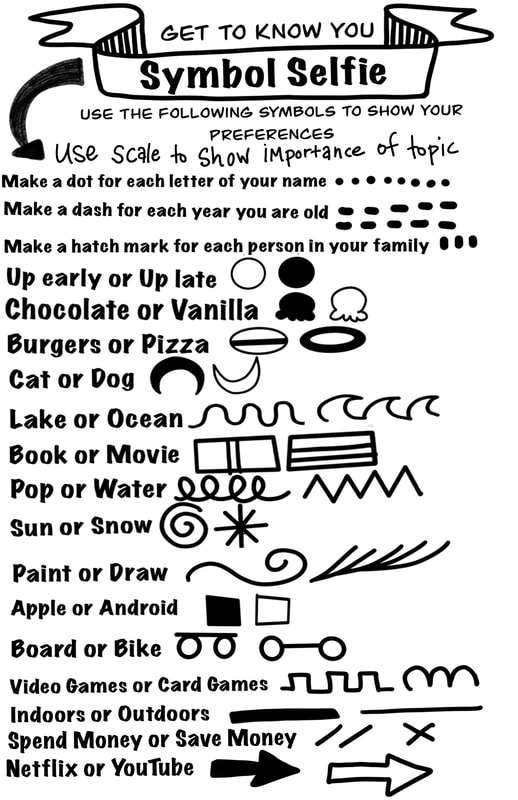
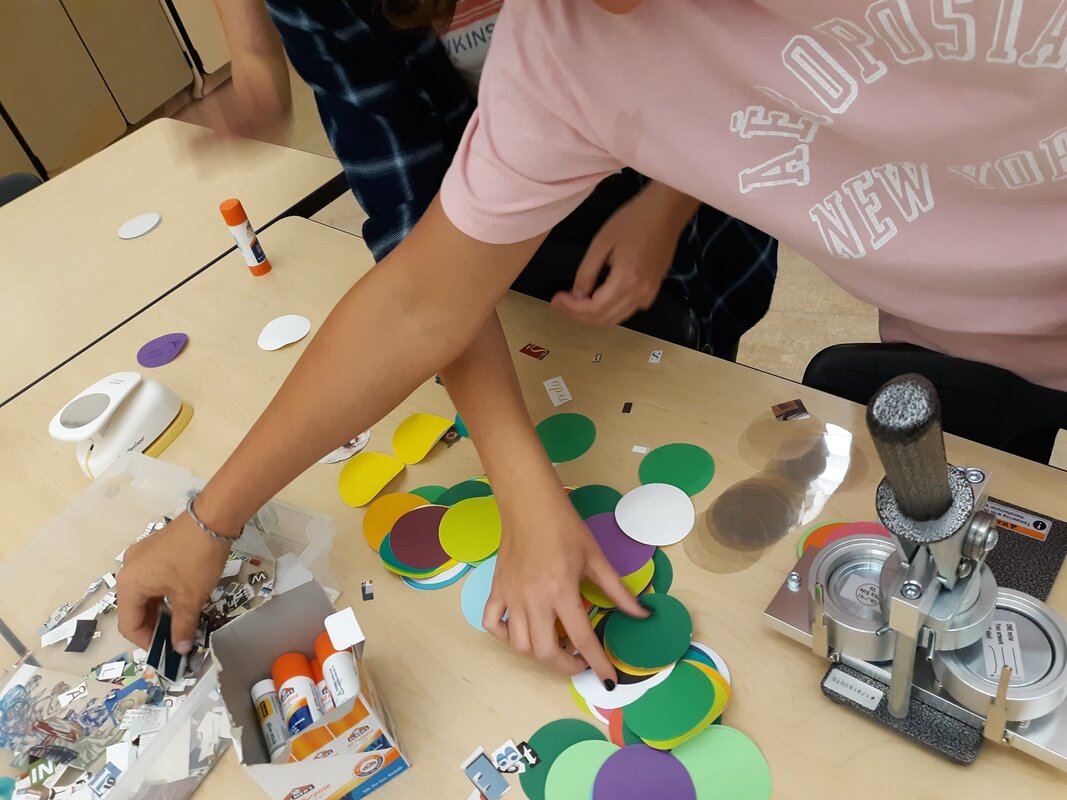
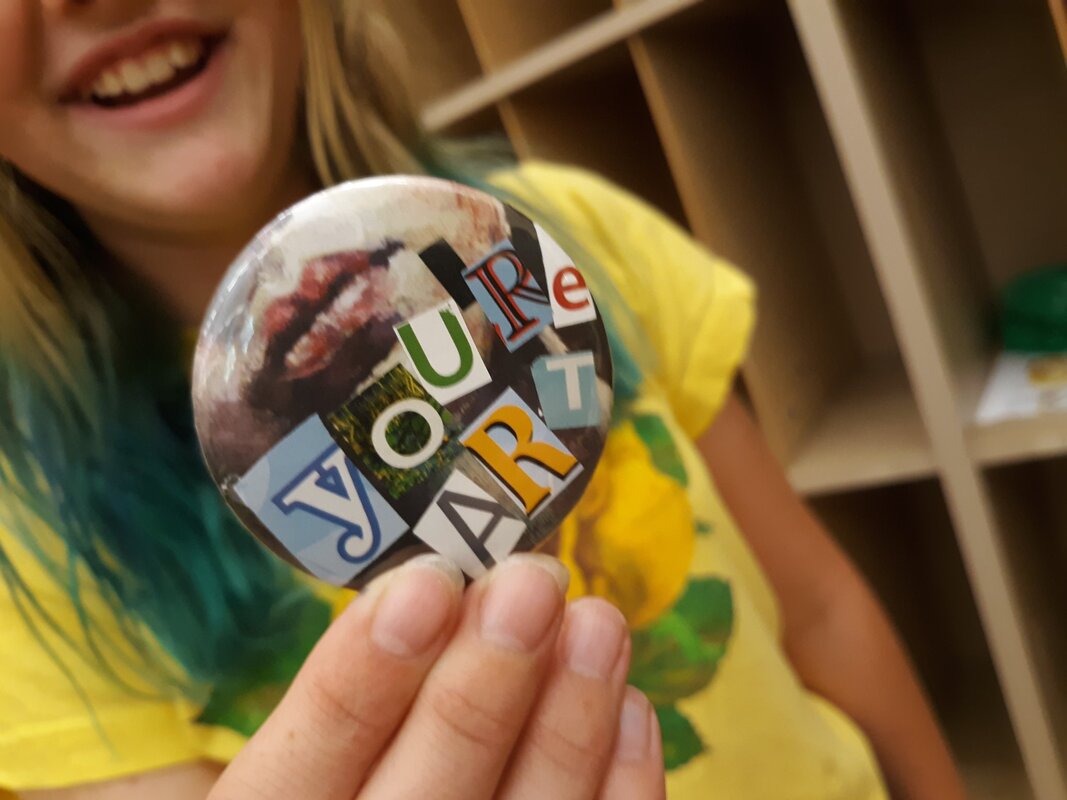
We started a new semester two weeks ago, and one thing that is very important when getting a new group of students is exposing them to the materials and concepts being taught right off of the bat. One project that we have used this year to do this is called the "Symbol Selfie" where students use basic symbols in the iPad program Procreate to make an image that shows what their preferences are using a "this or that" menu of options. This low-pressure, high-success skill builder helps students understand and use the basic functions with the drawing app while also letting me in on some of the things they enjoy. What is even better about this is that it is a quick 1-2 day process before students are also able to upload them to Artsonia and get used to doing that through the app, too. This project is adapted from Ms. Koslow's ArtRoom (@mskoslowsartroom) via Instagram. She has posted her version as well as examples of this using colored pencils online. Feel free to use the worksheet below or adapt as you see fit for your classroom. If you use it, please give my class a shout-out because we love seeing how others adapt our ideas! Happy Creating!Two years ago, I was able to get a button maker from DonorsChoose.org. When requesting this, my goal was to use it during our Fine Arts Night as a way for everyone who attended to make and take their own Mobile Masterwork as a wearable piece of Art. Now that we have the tools to create buttons, we have been able to extend the use of this device to include events like our parent orientation as a way to draw people in to making something that does not take a lot of time and gets instantly satisfying results! Below is a breakdown of the basics with the button maker I requested for the project using Blick Art Supplies. Some additional helpful things include having a Cricut cutting machine that can precut the circles on paper, having students cut letters from magazines and store to decorate their button (using precut magazine images not only is great for recycling, but it also gives people who may be uncomfortable with drawing a way to still feel creative), and other 2D media to use with the cut paper. One thing to make note of is the thickness of the paper before you put it in your machine - it matters and can have an impact on the quality of the button made. I love using DonorsChoose.org for helping my classroom get fun new tools like this. If you use this link to create a DonorsChoose.org account, I will be able to help promote your project as a DonorsChoose.org Teacher Ambassador. It will let me know when you have signed up and posted your first project - I also have a code I can use to help you fund your first project!
If you would like to help my class fund our current DonorsChoose.org request, please visit and donate here. Button making is a fun and easy way to invite others into your room to get creative with their ideas. If you happen to use this or have done this in your school, I would love to know how! If you do end up doing it, please give me a shoutout on Twitter or Instagram so I can see the results! Happy Creating!
One fun thing about the end-of-summer-ramp-up-to-the-new-school-year is that you get to enacted ideas because there is time to stew on them and actually do them some justice. When the school year starts, much of what we are doing has been planned and tested and worked on during the summertime.
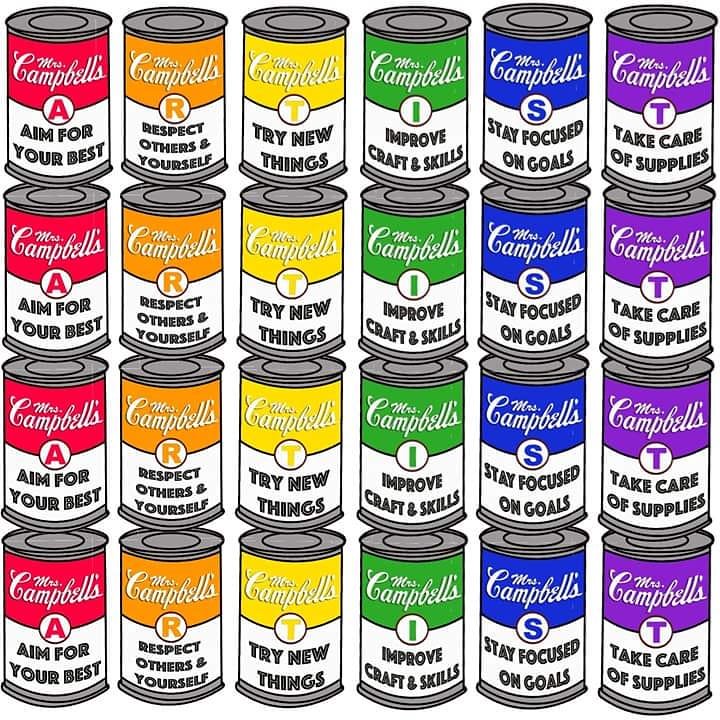
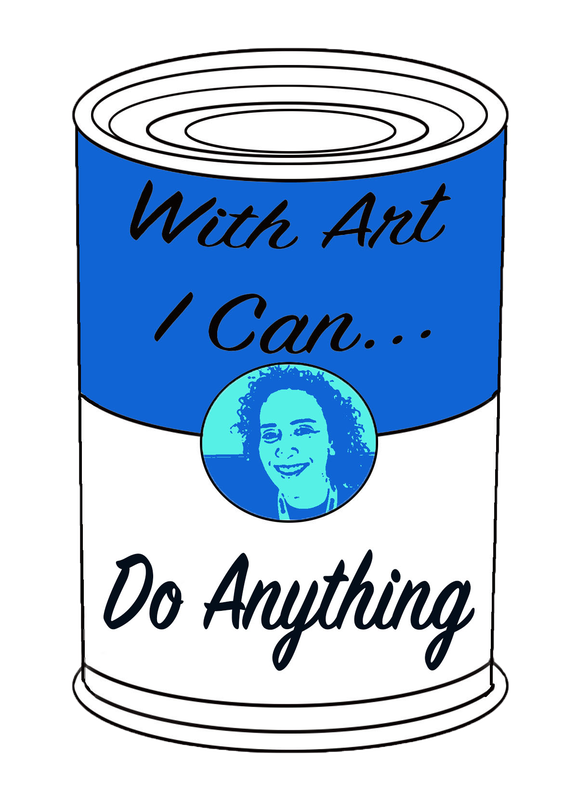
This summer, I was inspired by teachers who use the word ARTIST as a way to chart expectations of behavior. As a teacher who leans heavily on choice in the studio, I wanted to also link these behaviors with Studio Habits and think I was able to come up with a compromise of language that both works for my students and will help foster a positive and productive environment in our classroom. I know it doesn't have everything, but hopefully when paired with the DICE design thinking (shared in the previous post) it will ALL be covered. Our school also focuses on "I can" statements, so I guess you can say I've got that covered, too! My husband and I just celebrated 15 years of marriage this week and when we got married, one of the first major decisions I had to make was whether or not to take his last name. Being a Warhol fan and the opportunity for imagery like these posters wasn't the only factor in my choice... but I would be lying if I said it wasn't - I mean, it is perfect!
I have had multiple requests to post these for others to use (even some who want to pay me - how flattering!). I do not have a TPT or anything like that because I am ok with sharing resources, for free, with other teachers that are used to help students in the classroom. If you would like to use them as is or modify a blank version, the files are below for you to use.
I just ask that if you use it, you give credit or a shout out when you share/display (tag me so I can see it on Twitter or Instagram) and if you are feeling generous, you can donate to our DonorsChoose.org page - we are currently $168 from completing our current project.
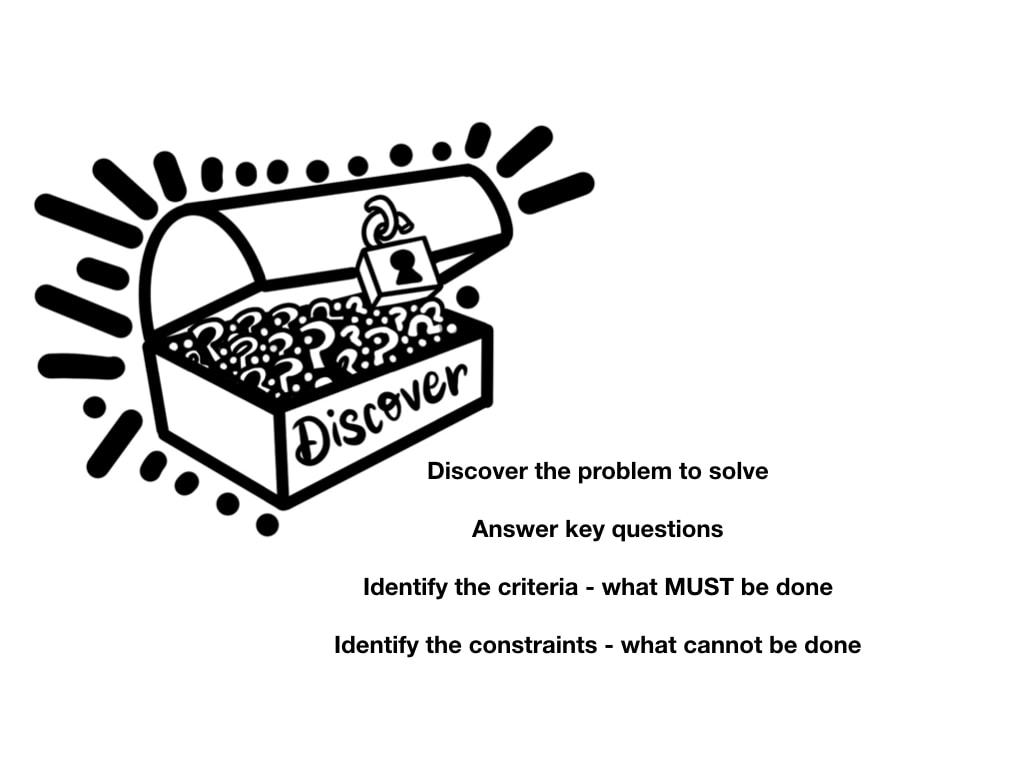
It is August and that means it is time to start thinking about how I am going to get myself organized for the school year. Thinking about what I want students to be able to understand and do becomes a central organizing principle for me as I ease back into the mindset of teaching and learning. One thing, if nothing else, that I want to help my students understand about being creative is that you CAN DEVELOP a process for it. That if you are "bad" at art or making things or coming up with ideas that are interesting and new, you can use a process that will help you develop the stamina to push through roadblocks and find interesting solutions. About five or six years ago, I went to MACUL and attended a presentation by D'Andra Clark that explored design thinking in her classroom. She is an art teacher who had partnered with the technology teacher and they decided they needed to come up with a common language to help students see the commonality in their classes. They used DICE (illustrated by me above and below) as a way help reframe the approach to design thinking. I knew as soon as I heard this what had been lacking between Art and STEM all of these years at my school. We needed to adapt common practices and ways of working that would help students see a routine in the way we work and shared language in our content areas. You are welcome to download the files and print them out or make them into bigger posters. If you do, please just credit the illustrations and do not copy and sell them. I would love to see how you do use them, so please make sure you share what you do with them, including @campbellartsoup on Twitter or Instagram. When I had shared that I was planning to post these, many teachers said they would like to offer some kind of something for their use. If you would like to support my classroom, you can donate to our current DonorsChoose.org project or purchase my illustrated works on items in Artsonia's gift shop (20% of purchases goes back to our school). All of these were created this summer using the app Procreate with the iPad and Apple Pencil.
|
Janine CampbellTeaching Visual Arts since 2004 and making images since picking up a crayon Archives
January 2022
Categories
All
|
||||||||||||||||||||||||||||||||||||||||||||||||||||||||||||||||||||||||||||||||||||||||||||||||||||||||||||||||||||||||||||||||||||||||



 RSS Feed
